1. Motivation
TechFolio Designer (TFD) is a cross-platform desktop application, implemented using Electron, which is intended to simplify the management of your professional portfolios.
Prior to the development of TFD, creating a personal TechFolio required choosing between the following:
-
Edit TechFolio files in the cloud using GitHub’s browser-based editing tools. This requires no setup, but browser-based editing is very primitive and error-prone. In particular, it is very easy to make mistakes while editing the bio.json file.
-
Edit TechFolio files locally. This requires you to use a git client (so that you can download the files to edit, and upload them back to GitHub after you’ve finished), and to use an IDE to edit the files. This requires some sophistication with git as well as knowledge of an IDE. In addition, as the IDE does not “know” about the structure of TechFolio files, it is still relatively easy to make errors.
TFD provides a third alternative, one where the desktop application builds in knowledge about TechFolio portfolios and the need to use git to host them at GitHub. This means:
-
TFD provides a simplified interface to Git and GitHub. After authenticating, TechFolio provides simple menu commands to obtain your portfolio files from GitHub for editing and to upload them back to GitHub for publication.
-
TFD provides editors for Projects and Essays. Since these editors are designed to be used only for TechFolio files, they can build in knowledge about Markdown and YAML front matter to prevent common problems.
-
TFD provides a simplified, form-driven user interface for editing the bio.json file. This ensures that the JSON file syntax is maintained.
TFD is still under initial development, and does not yet implement all of the potentially helpful features such an application could have. We hope that you will find it convenient to use even in its current state.
2. Installation
2.1 Install git
TFD requires that you have git installed as a command line tool. To install Git, please follow the appropriate instructions for your operating systems at the Git Download Page.
Before installing TFD, please verify that you have successfully installed git by opening a shell and typing git --version. (On Windows, be sure that the git command runs in a “regular” shell, not just a PowerShell.) For example:
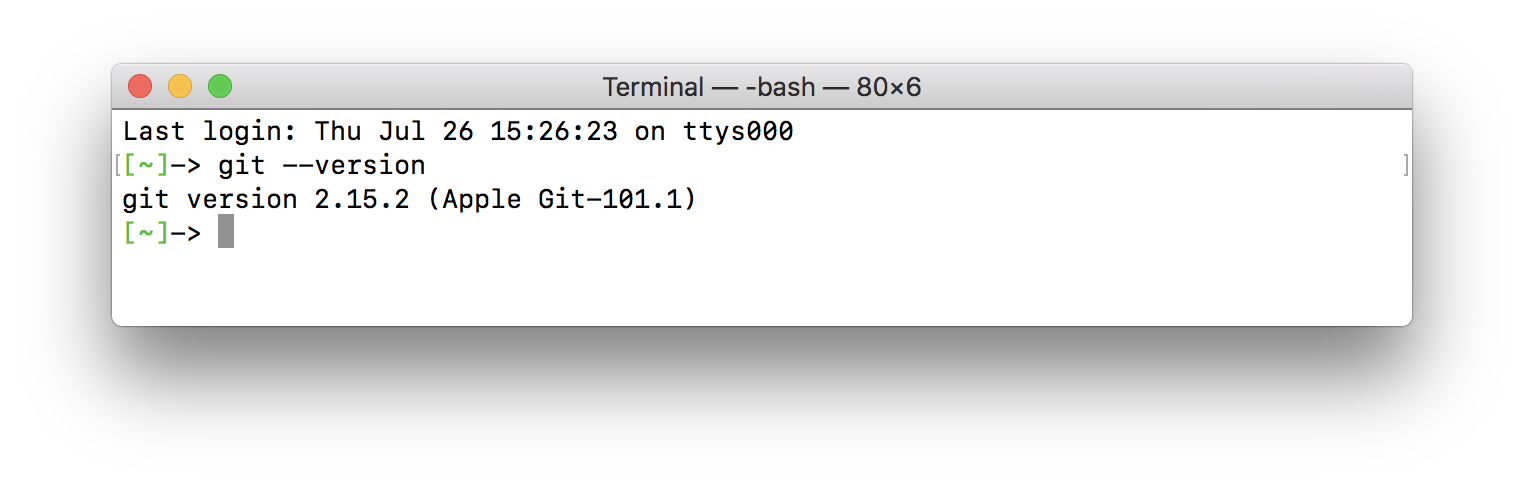
Note: Make sure you have installed Git version 2.18 or above on Windows.
2.2 Install TechFolio Designer
After you have installed git, go to the TechFolioDesigner Release Page and download a copy of the latest release appropriate for your platform. We strive to have releases for Windows, Macintosh, and Unix.
Download the version for your platform and install in the appropriate manner.
- For OSX, download the zip file containing the string “darwin-x64”, unzip it, and move the application to your /Application directory.
- For Linux, download either the .rpm or .deb file depending upon your Linux version, and install using the appropriate utility.
- For Windows, download the .exe file and run it to perform the installation.
Since TFD is a newly developed application, your OS may provide warnings when you invoke it.
3. Using TechFolio Designer
Prior to using TFD, we recommend that you have completed at least steps 1 and 2 of the QuickStart. This means that you have created a username.github.io repository at GitHub (where username is your username), and that navigating to http://username.github.io will display the Molly Maluhia template techfolio (if not your actual portfolio).
3.1 Initial configuration
Once you have TFD installed, the first step is to configure it so that it can download your TechFolio files from GitHub and upload them after you’ve edited them. This takes a few steps, but you only have to do them once.
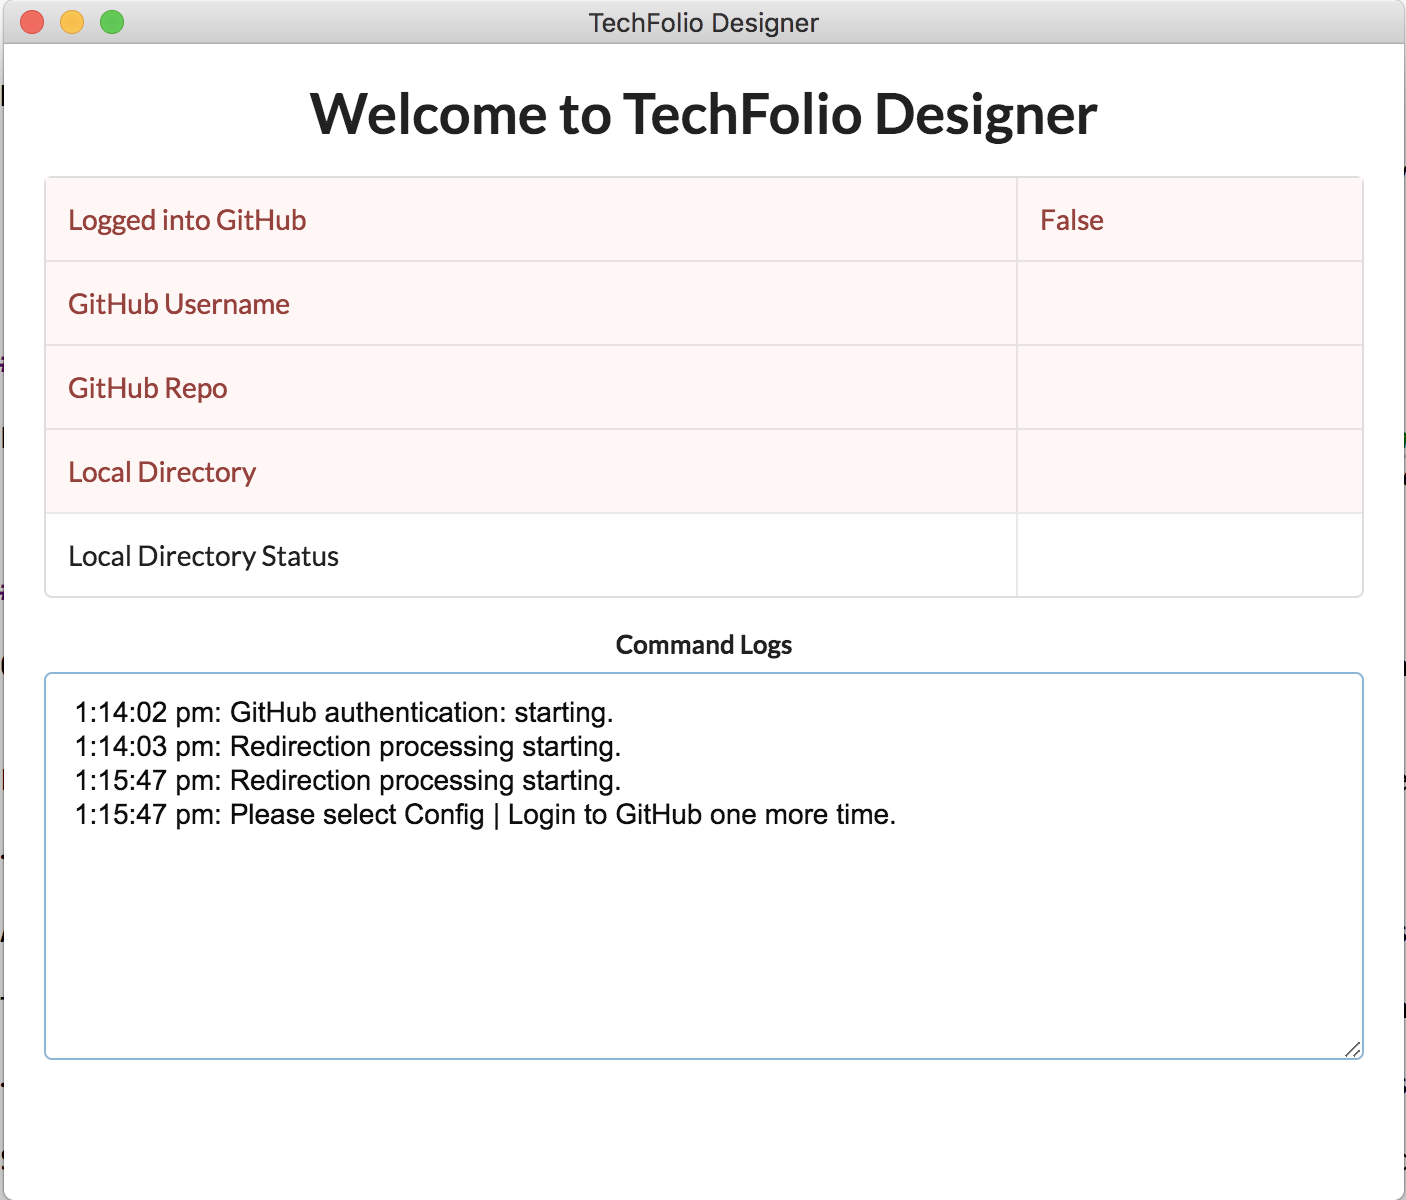
First, invoke TFD. It will bring up the TechFolio “Splash” window, which will look like this:
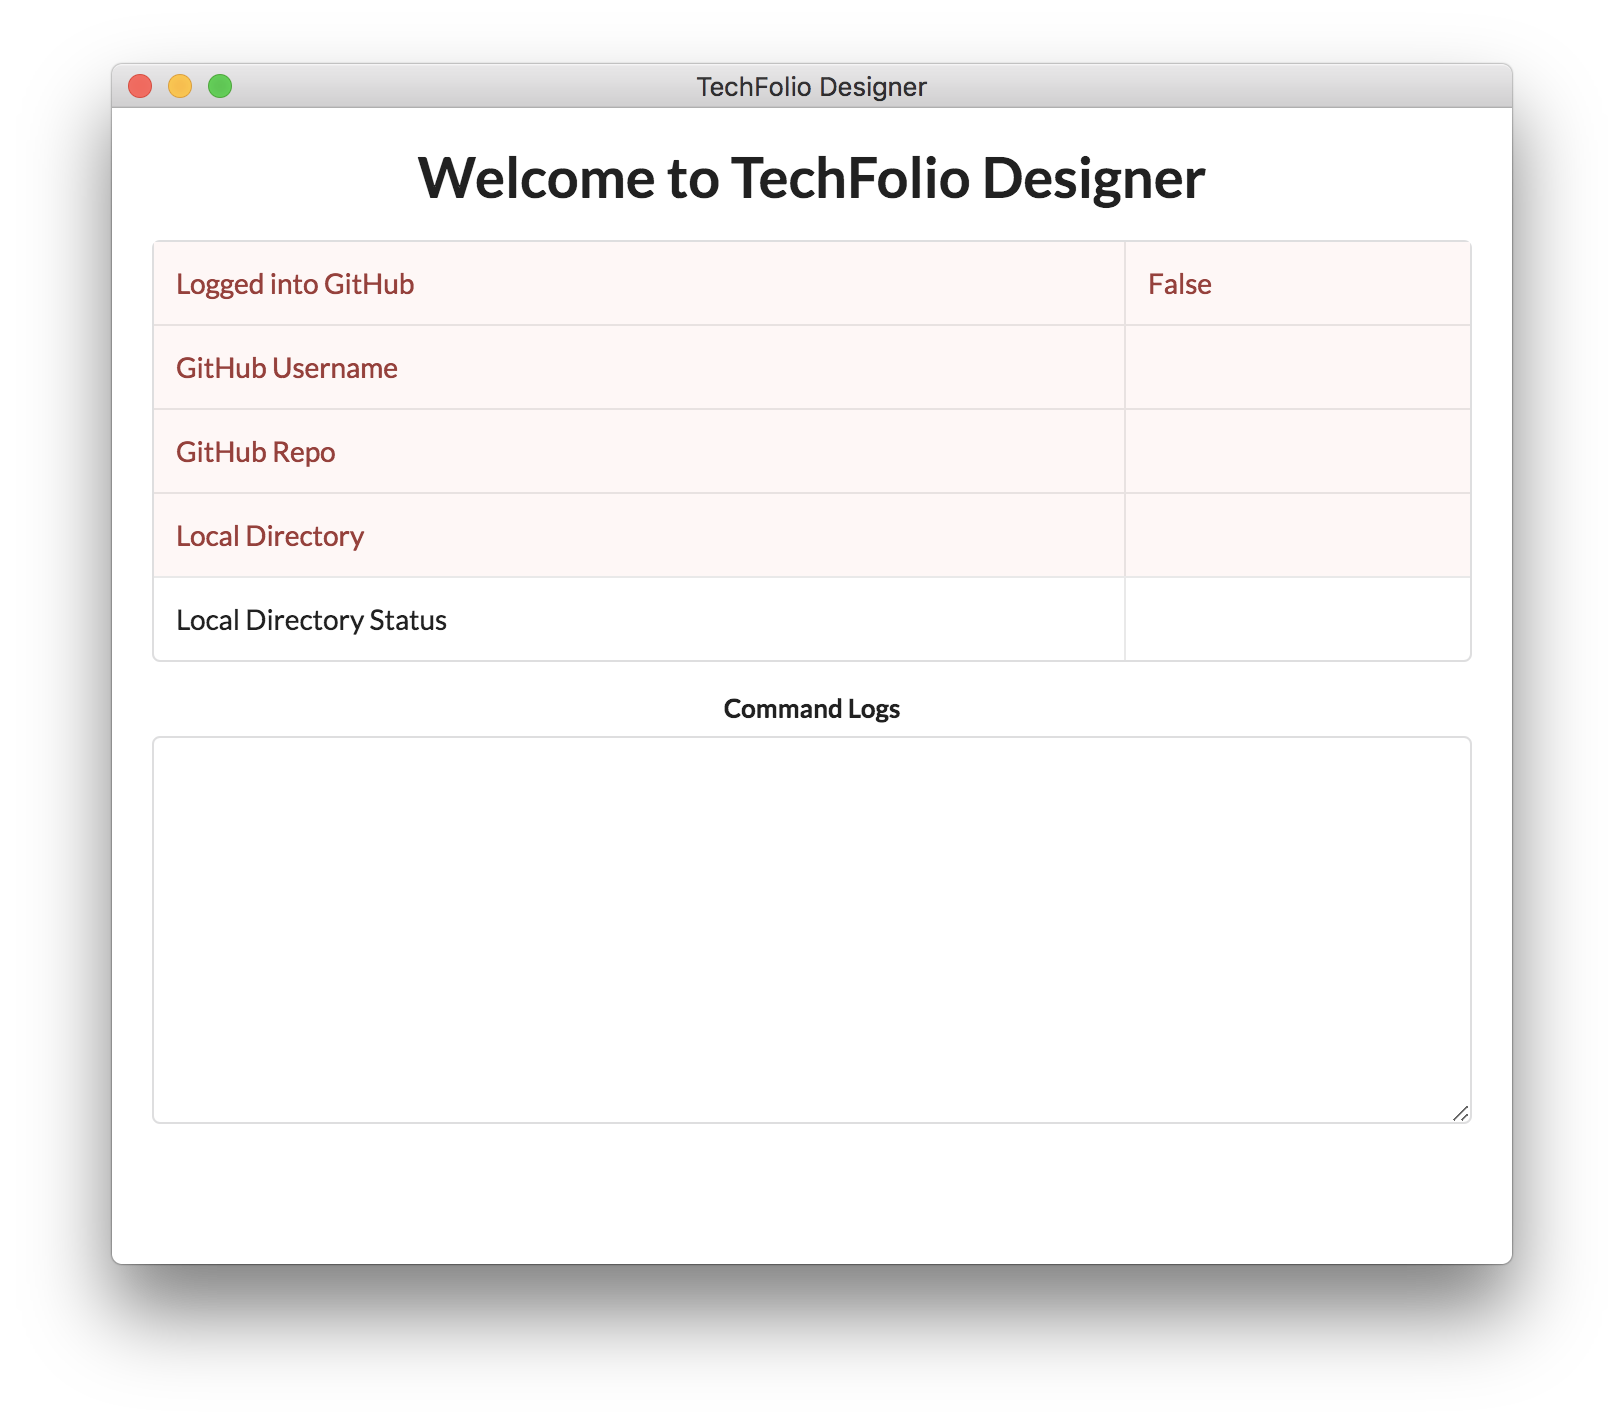
As you can see from the red highlights, there is some missing information that TFD needs before you can proceed.
TFD provides a “Config” menu to manage the interactions with GitHub. If you pull it down right now, it will look like this:
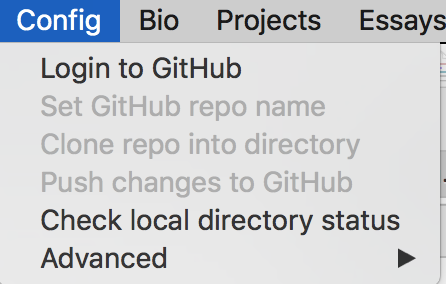
Several items are greyed out until you have logged in to GitHub. Let’s do that now.
3.1.1 Login to GitHub
Click the “Login to GitHub” menu item in the Config menu and the following window should appear:
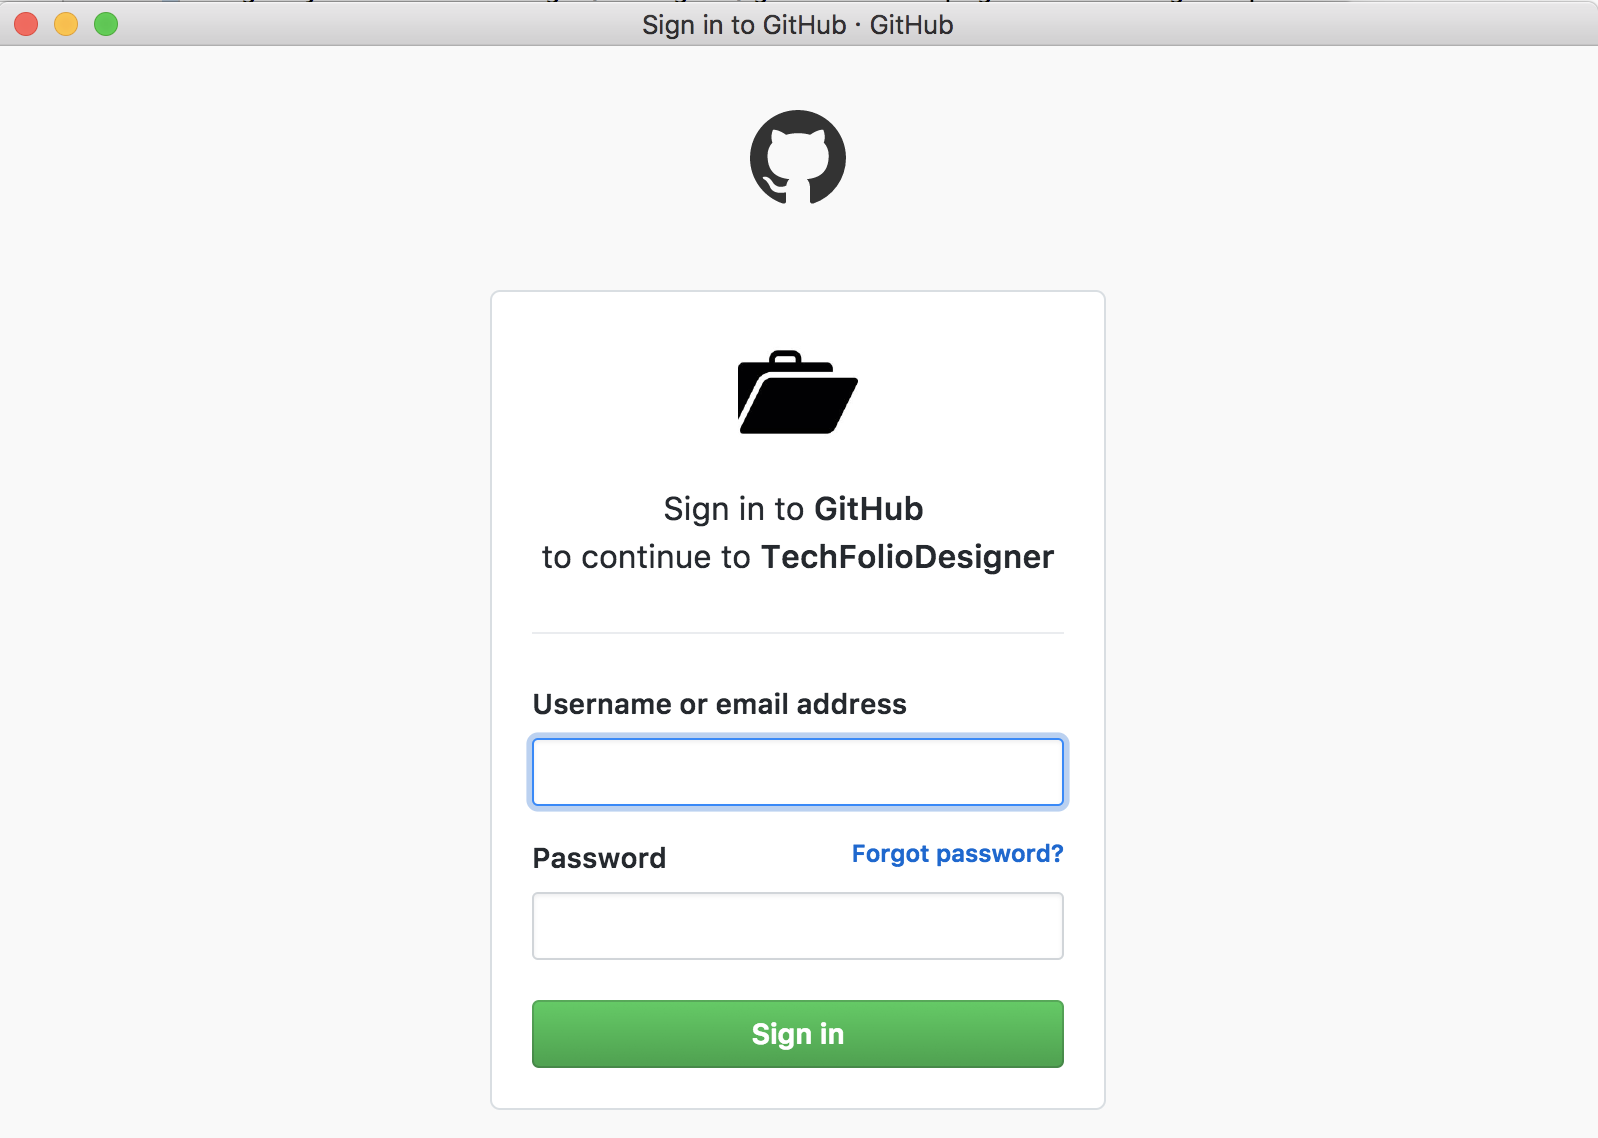
As requested, type in your GitHub username and password and click “Sign in”. If successful, you will now see the Splash window again, but now the “Console Logs” pane shows that some interaction occurred.
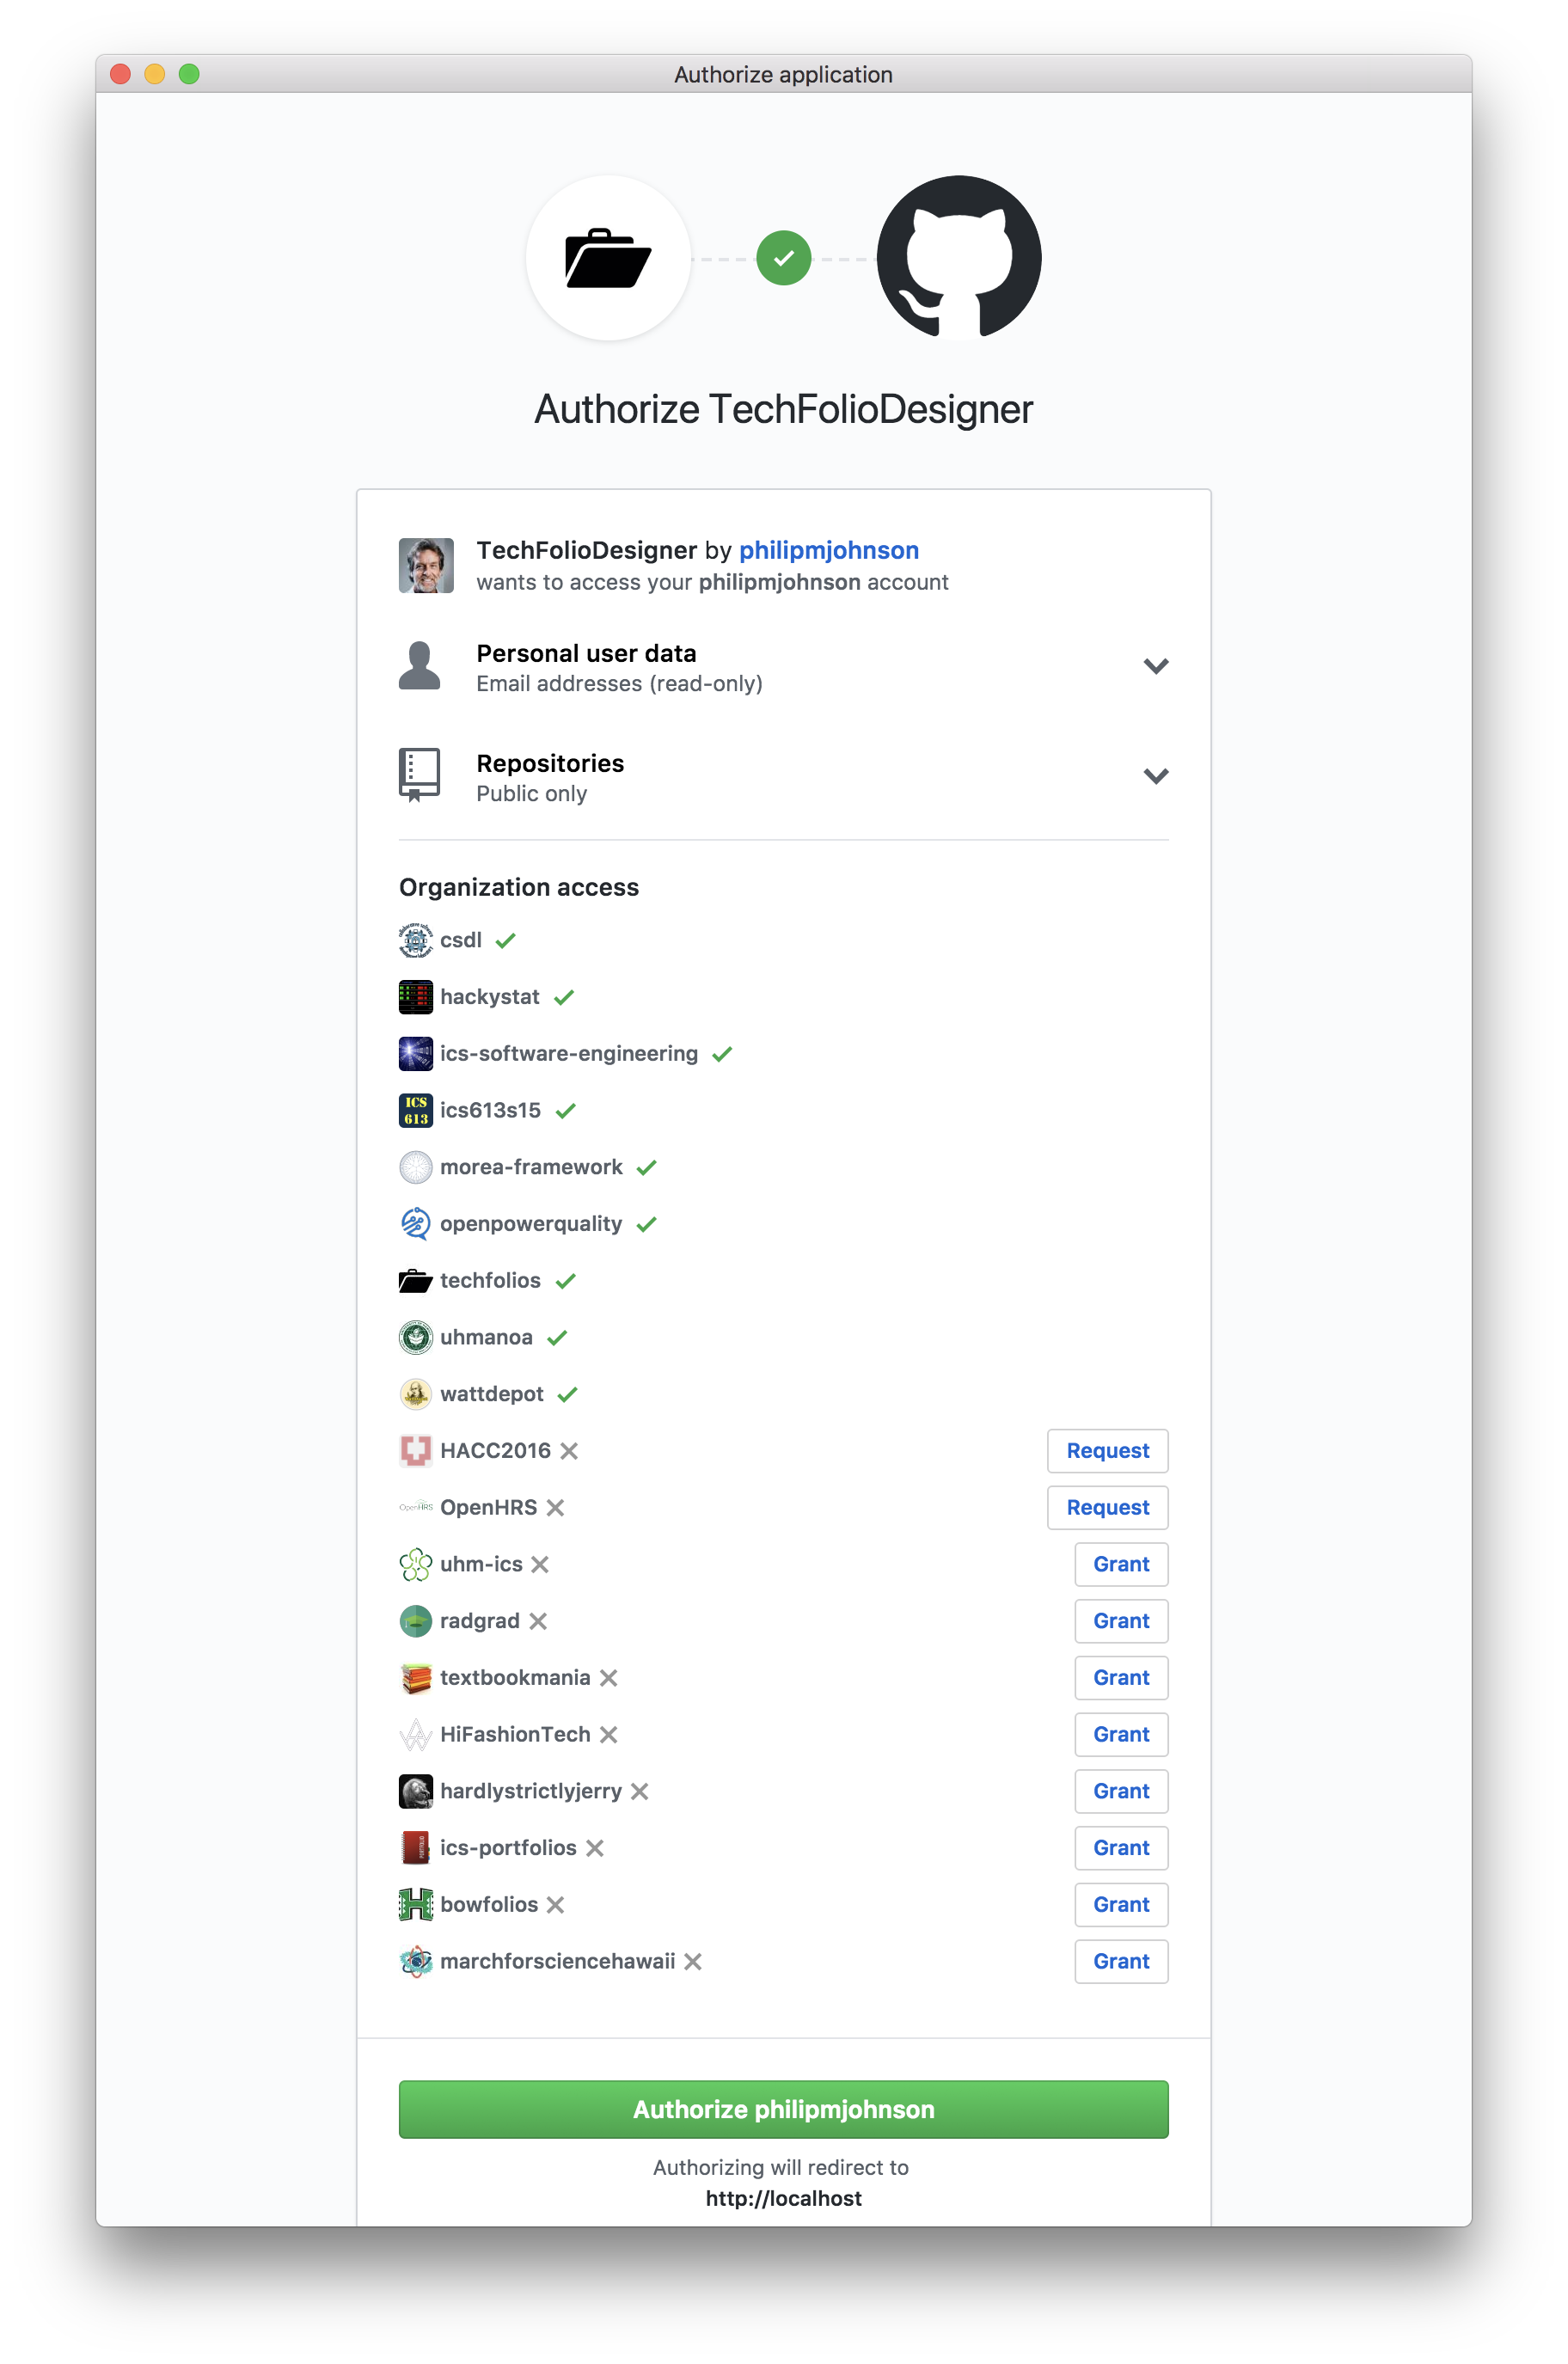
The bottom line requests that you “login to GitHub one more time”. Use the Config menu to do that, and you’ll now get an authorization window that looks something like this:
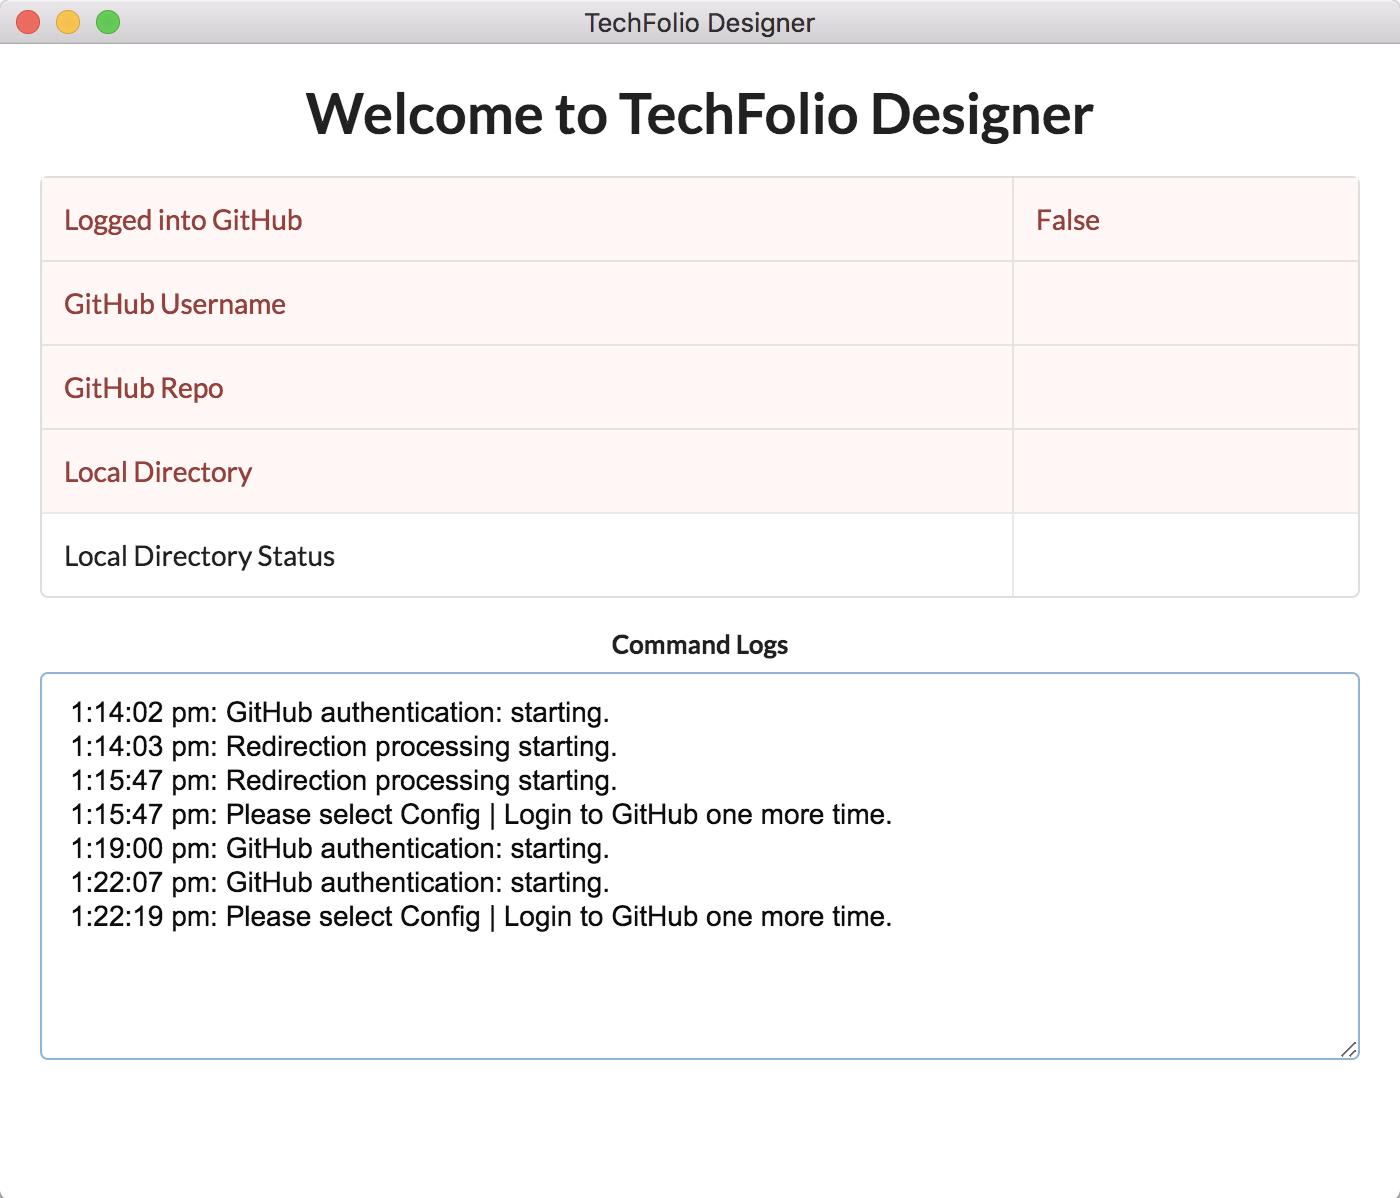
After clicking the Authorization button, you’ll once again see the Splash Window, with a second request to “login to GitHub one more time”:
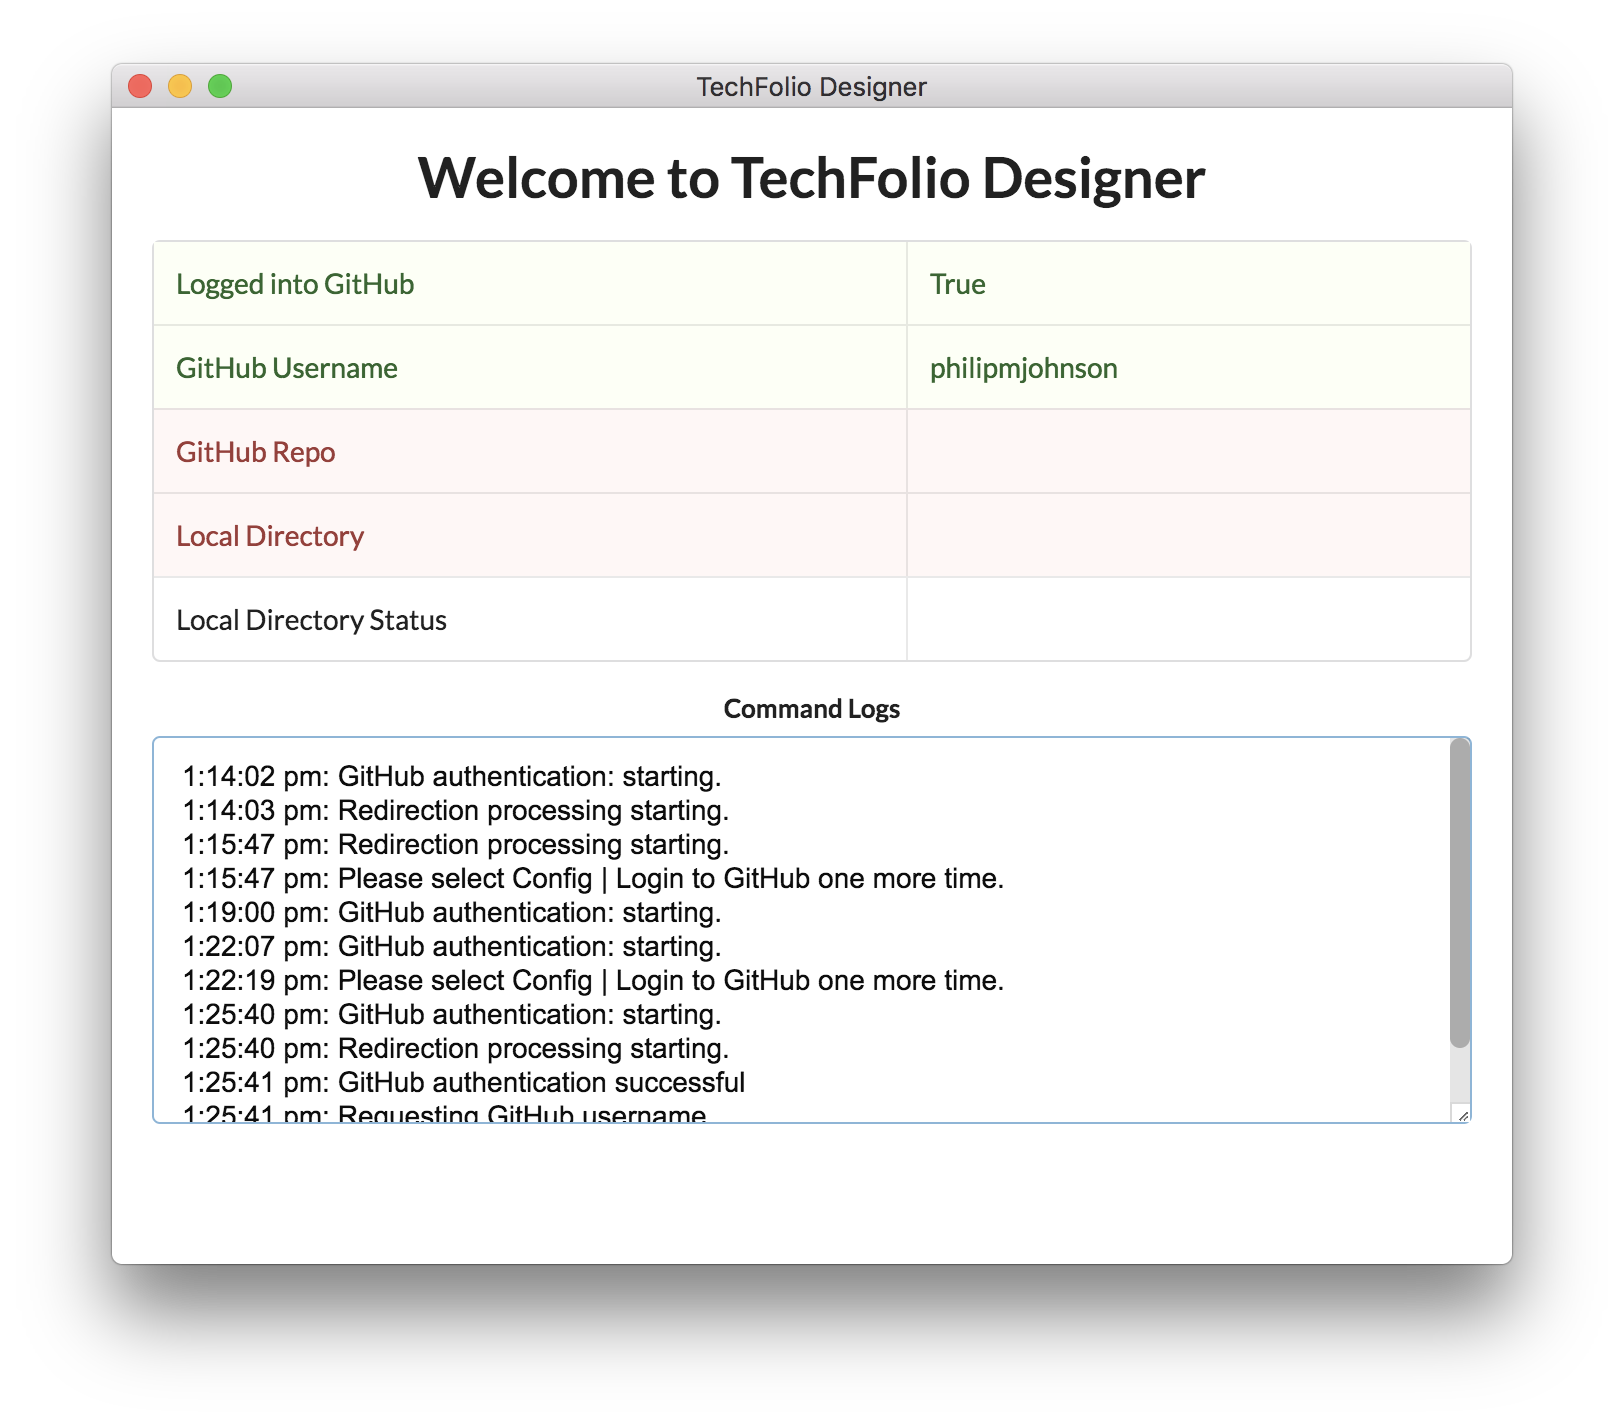
Please use the Config menu to click on the “Login to GitHub” menu item for the third (and final!) time. Now the Splash window should look like this:
The result of all this clicking is to provide TFD with an “personal access token” that it can use to both read and write to your public repositories on GitHub.
3.1.2 Specify your TechFolio repo
The next step is to tell TFD which repository is your TechFolio repo. From the Config menu, choose “Set GitHub repo name”, which will bring up the following window:
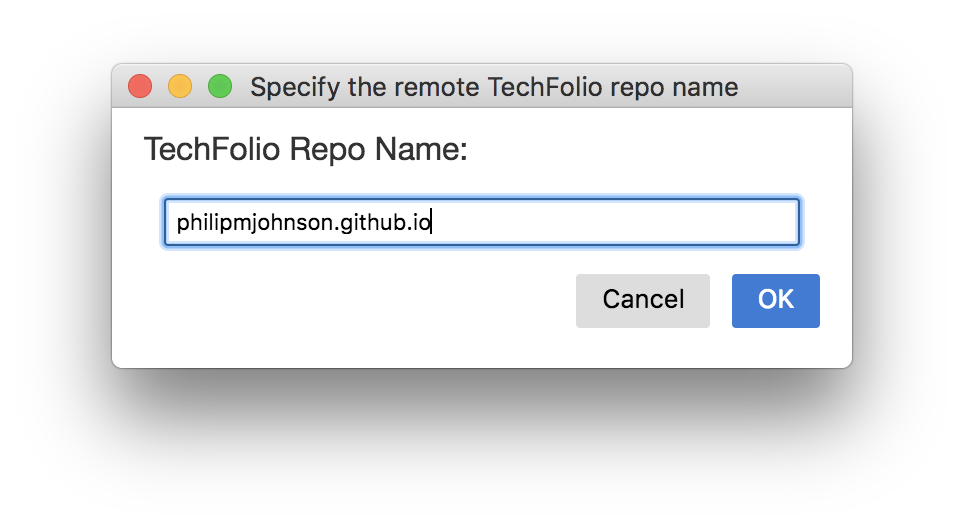
Note that it should default to the correct value. You can just click “OK.” Now the Splash Window should show that the GitHub Repo name field has been set:

3.1.3 Clone your repo
As you can see, we still need to provide a local directory the contains the TechFolio portfolio. In order to do that, we need to “clone” the repository from GitHub into someplace in our local file system. To start this process, use the Config menu to select the “Clone repo into directory”. After selecting this item, a platform-specific File Chooser window will appear. Here’s what mine looks like:
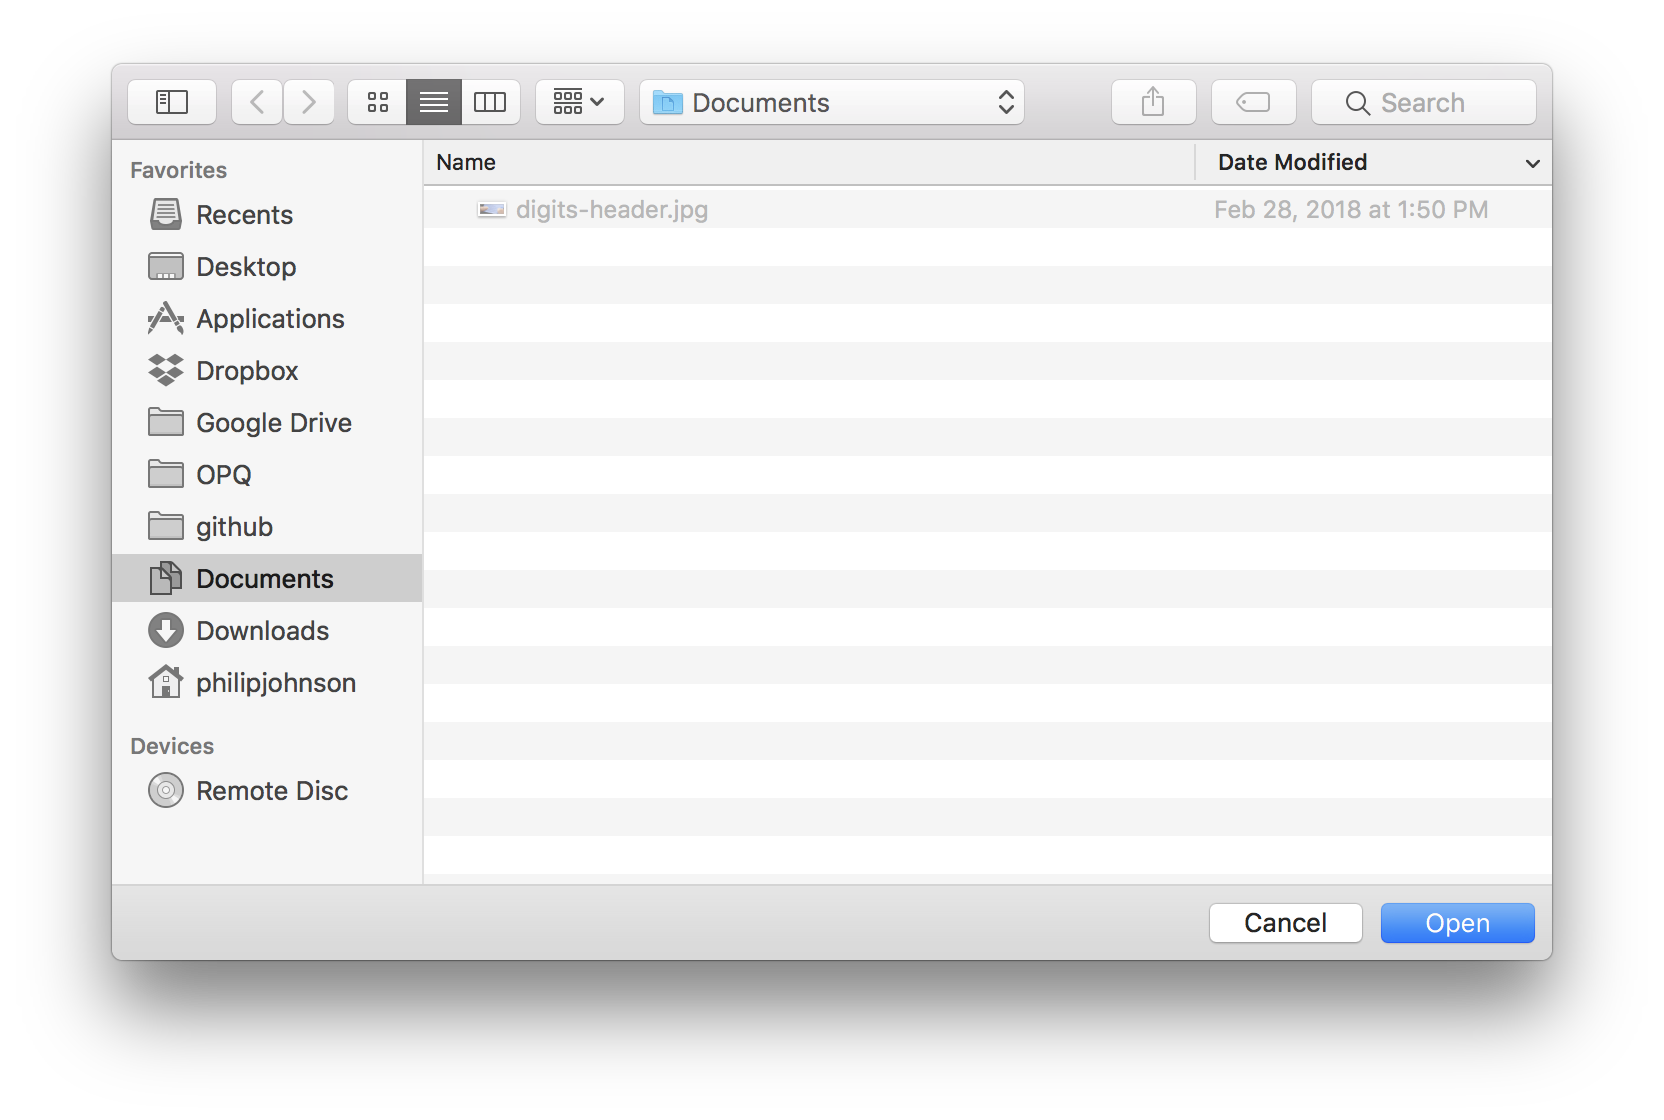
We now need to select a location into which a new directory (called username.github.io) will be created and which will hold your TechFolio files. I will choose “/Users/philipmjohnson/github” as the location and click “Open”. After doing so, the File Chooser window disappears, and the bottom line of the Command Log pane in the Splash window now looks like this:
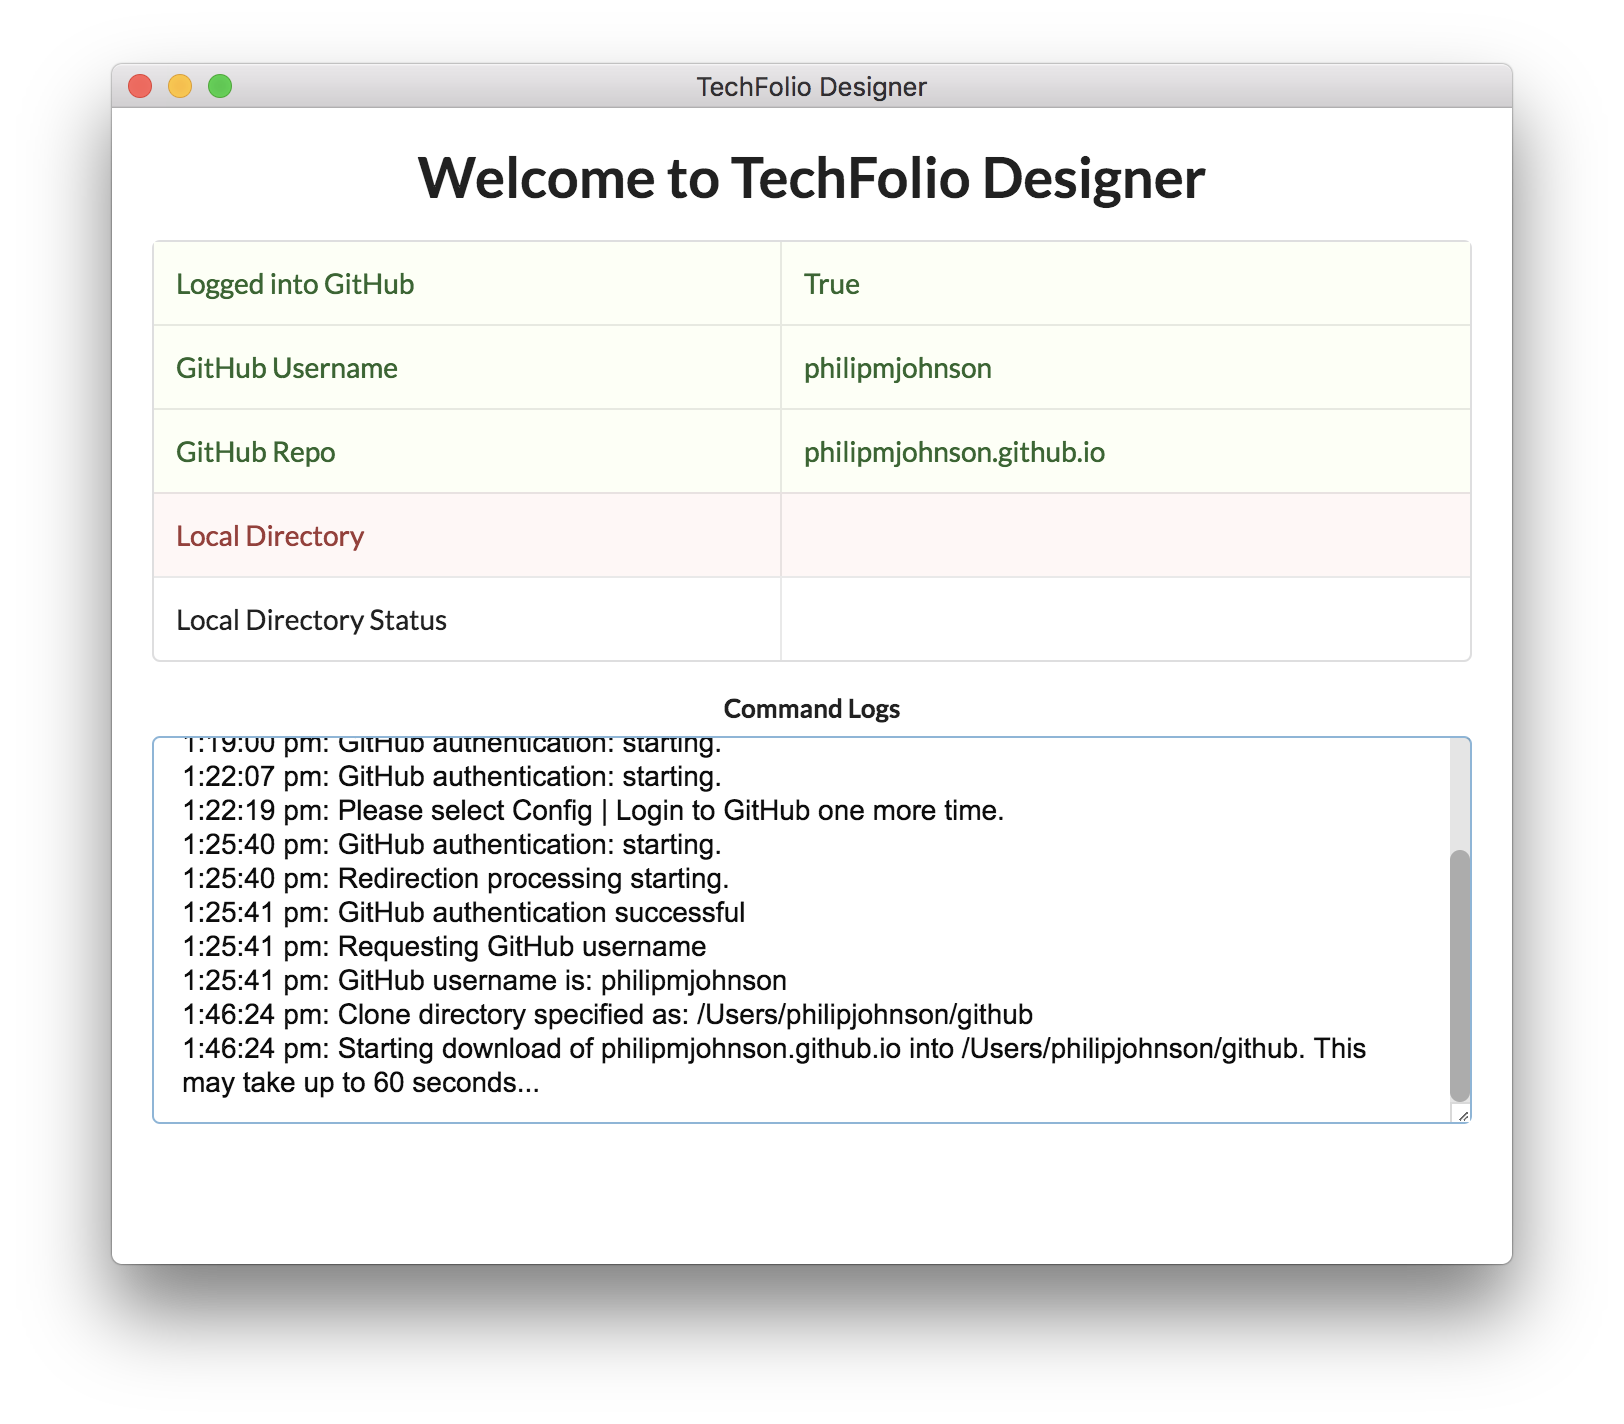
Notice that it tells you this process may take up to a minute to complete.
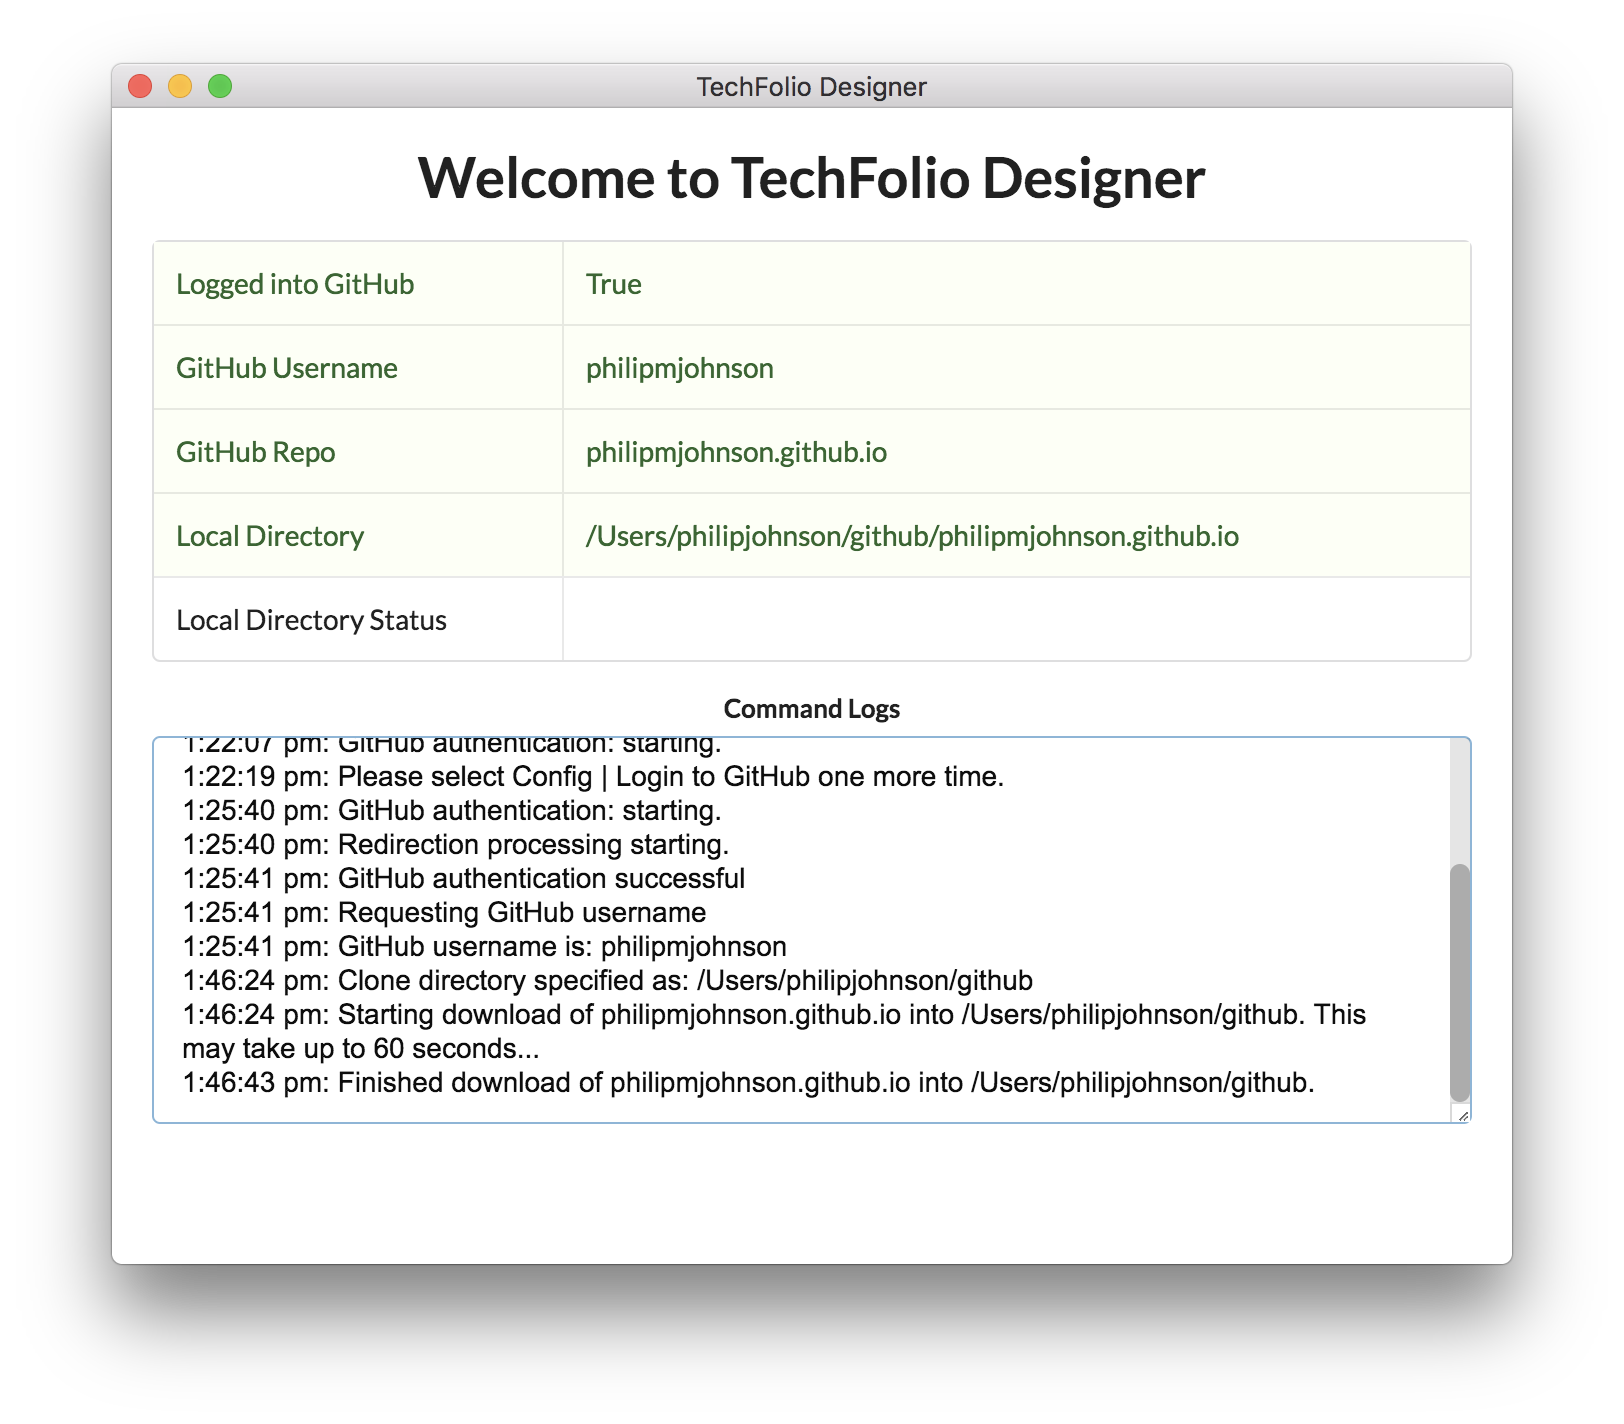
After a little while, the download completes, the Command Log pane tells you so, and the Local Directory row has now turned green and indicates the location of your TechFolio files:
Just to prove the point, here’s the window displaying the contents of my TechFolio files in the /Users/philipjohnson/github/ directory:

You’re now ready to edit TechFolio files. Note that the “Bio”, “Projects”, and “Essays” menus now display the files associated with your project. For example, here’s what my “Projects” menu looks like after cloning my TechFolio:
Note that TFD saves these settings, so the next time you run the system, you won’t have to redo all of this information. You will have to select the “Login to GitHub” menu item each time you login, but this is just so that system can check to make sure that your Personal Access Token is still valid. You shouldn’t have to enter your credentials again.
3.2 Editing bio.json
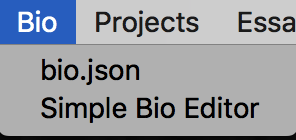
Editing the bio.json file is one of the most error-prone tasks when setting up your TechFolio, because the JSON syntax is fairly complicated and verbose, and GitHub provides little to no useful error messages when you make a mistake while editing this file. One of the goals of TFD is to make it much easier to edit the bio.json file by providing a form-based user interface. To bring up this interface, use the “Bio” menu to select the Simple Bio Editor menu item:
3.2.1 Simple Bio Editor
After selecting the Simple Bio Editor menu item, the following window appears, in this case displaying my bio.json data:

First, note that this window is tabbed and contains eight sections: Basics, Networks, Education, Work, Skills, Interests, Awards, and Activities. These correspond to the major sections of the bio.json file. You can edit any fields in the tab that you like, but you have to press the “Save” button at the bottom in order to save your changes to your local bio.json file.
Here is what the Networks tab looks like for me:
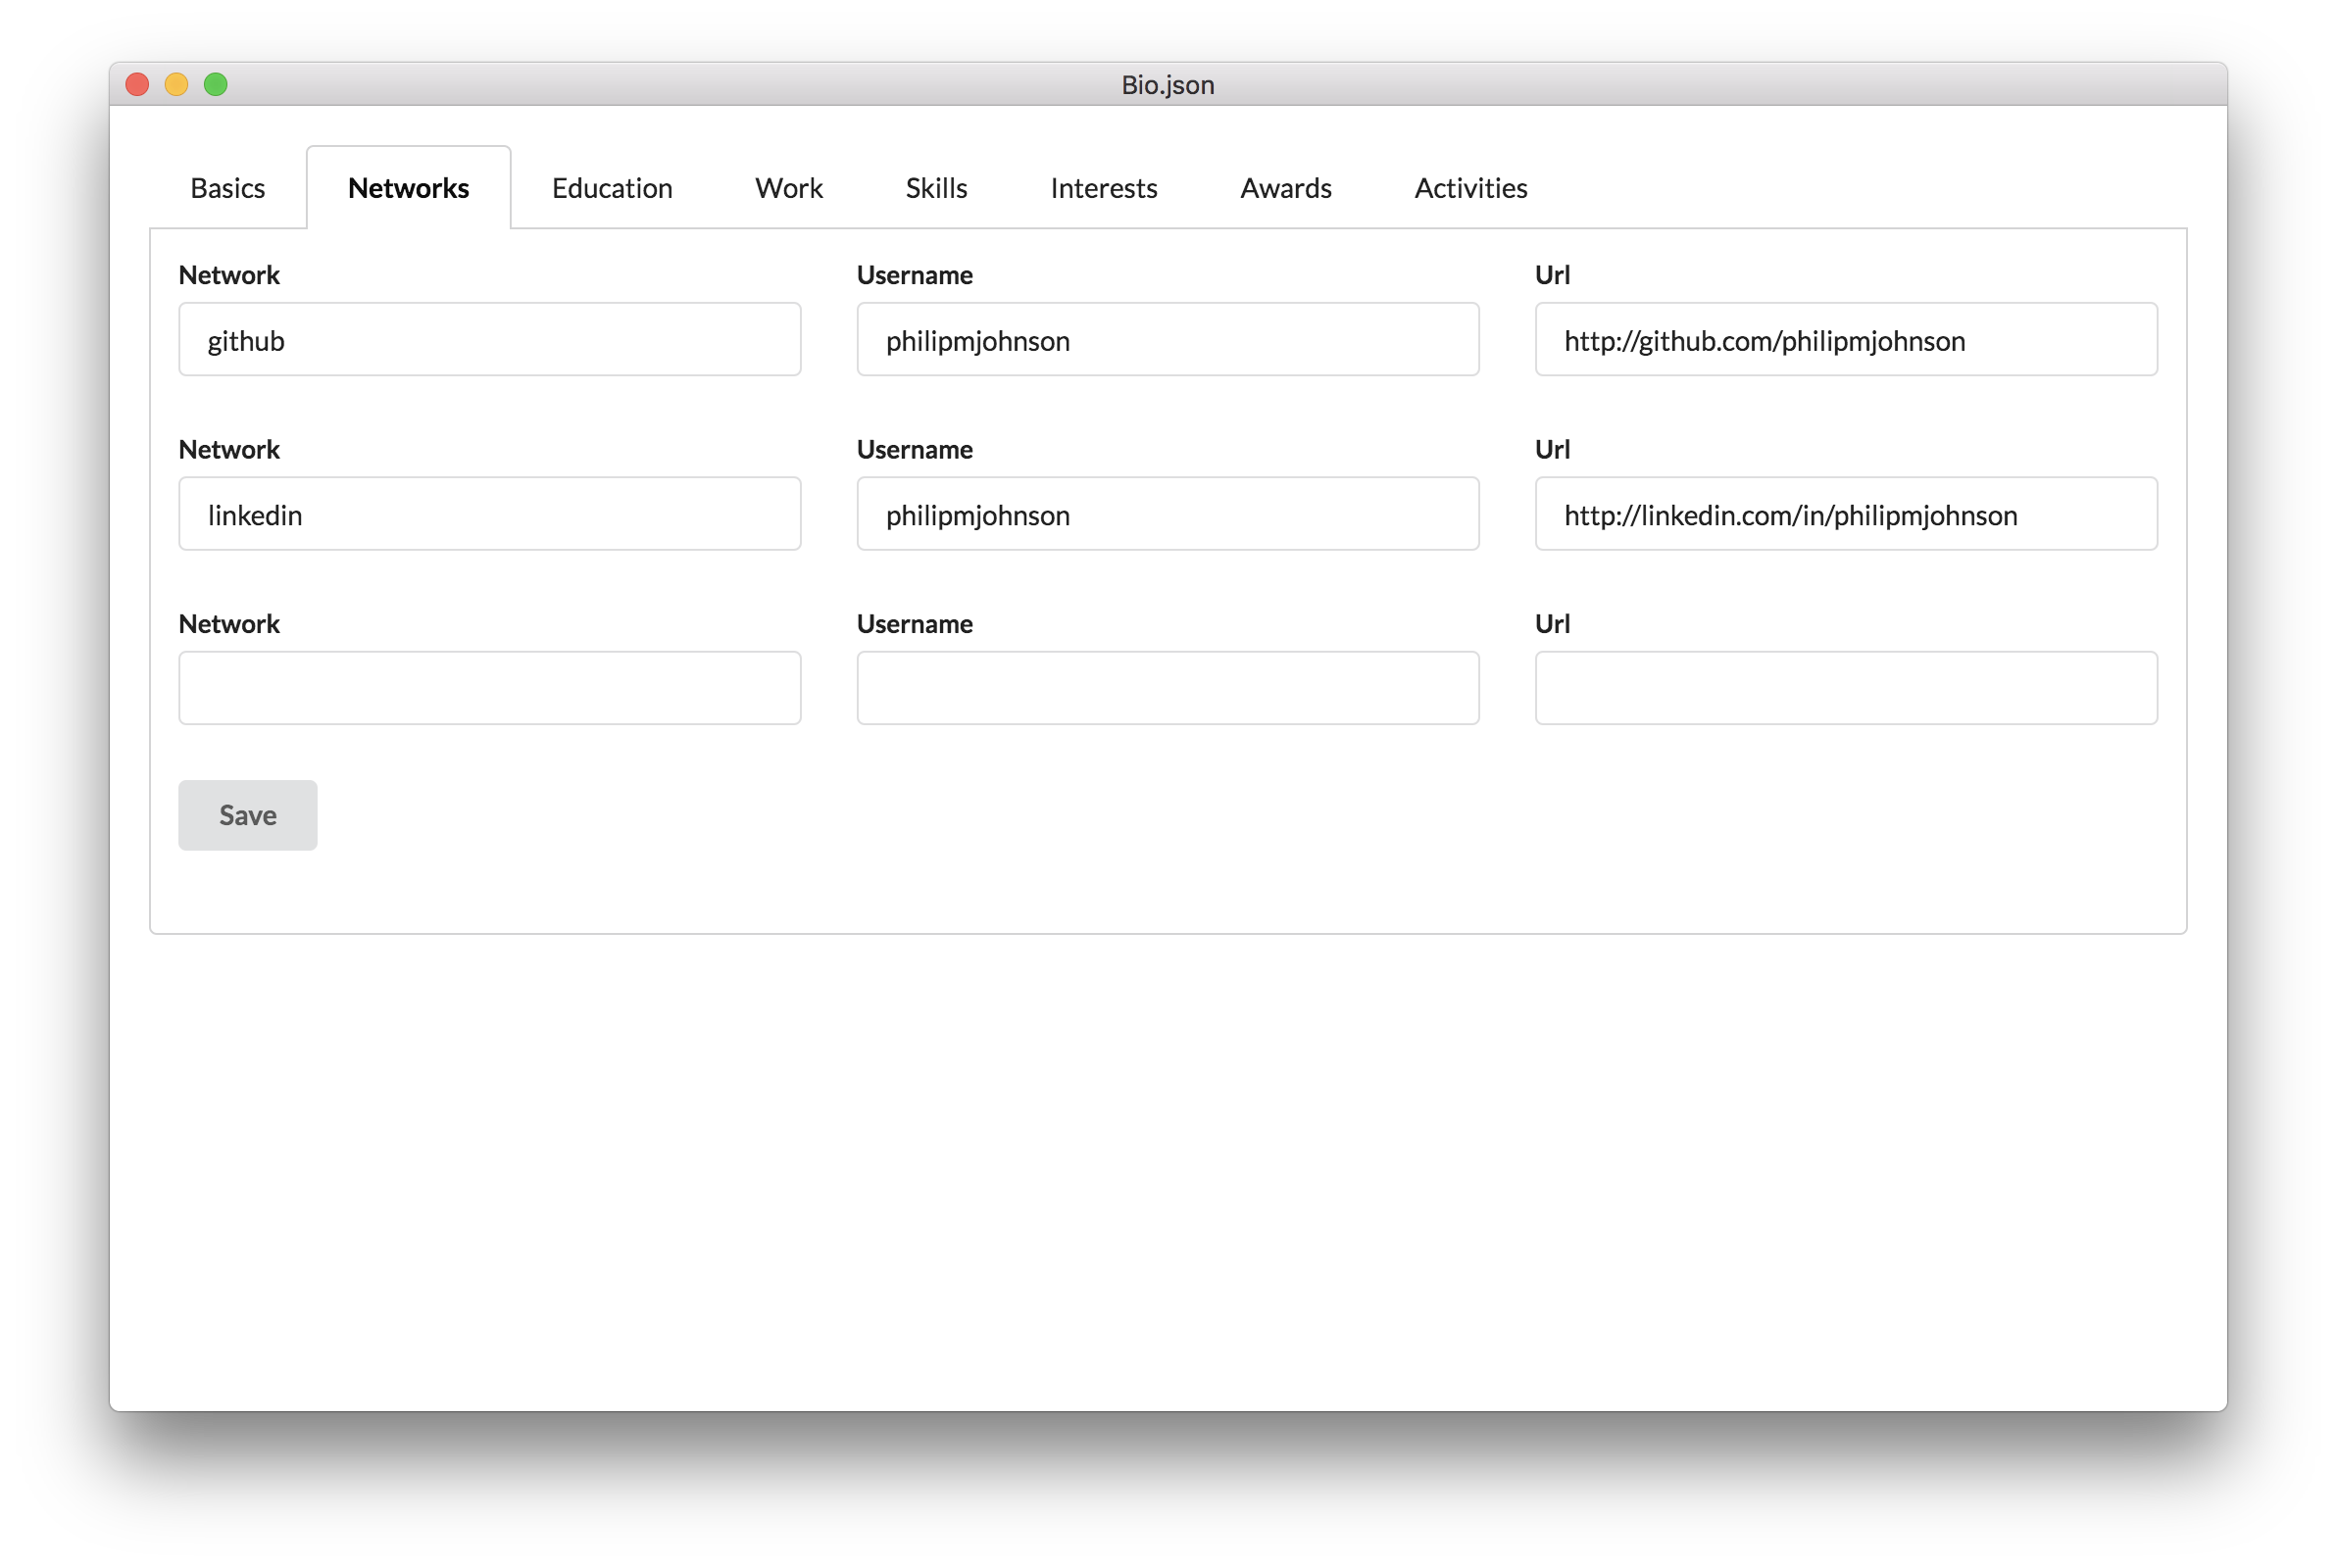
Because this is a “Simple” editor, you are limited to three networks. If you need more, you can use the “regular” Bio editor (see below).
Finally, here is what the Work tab looks like for me:
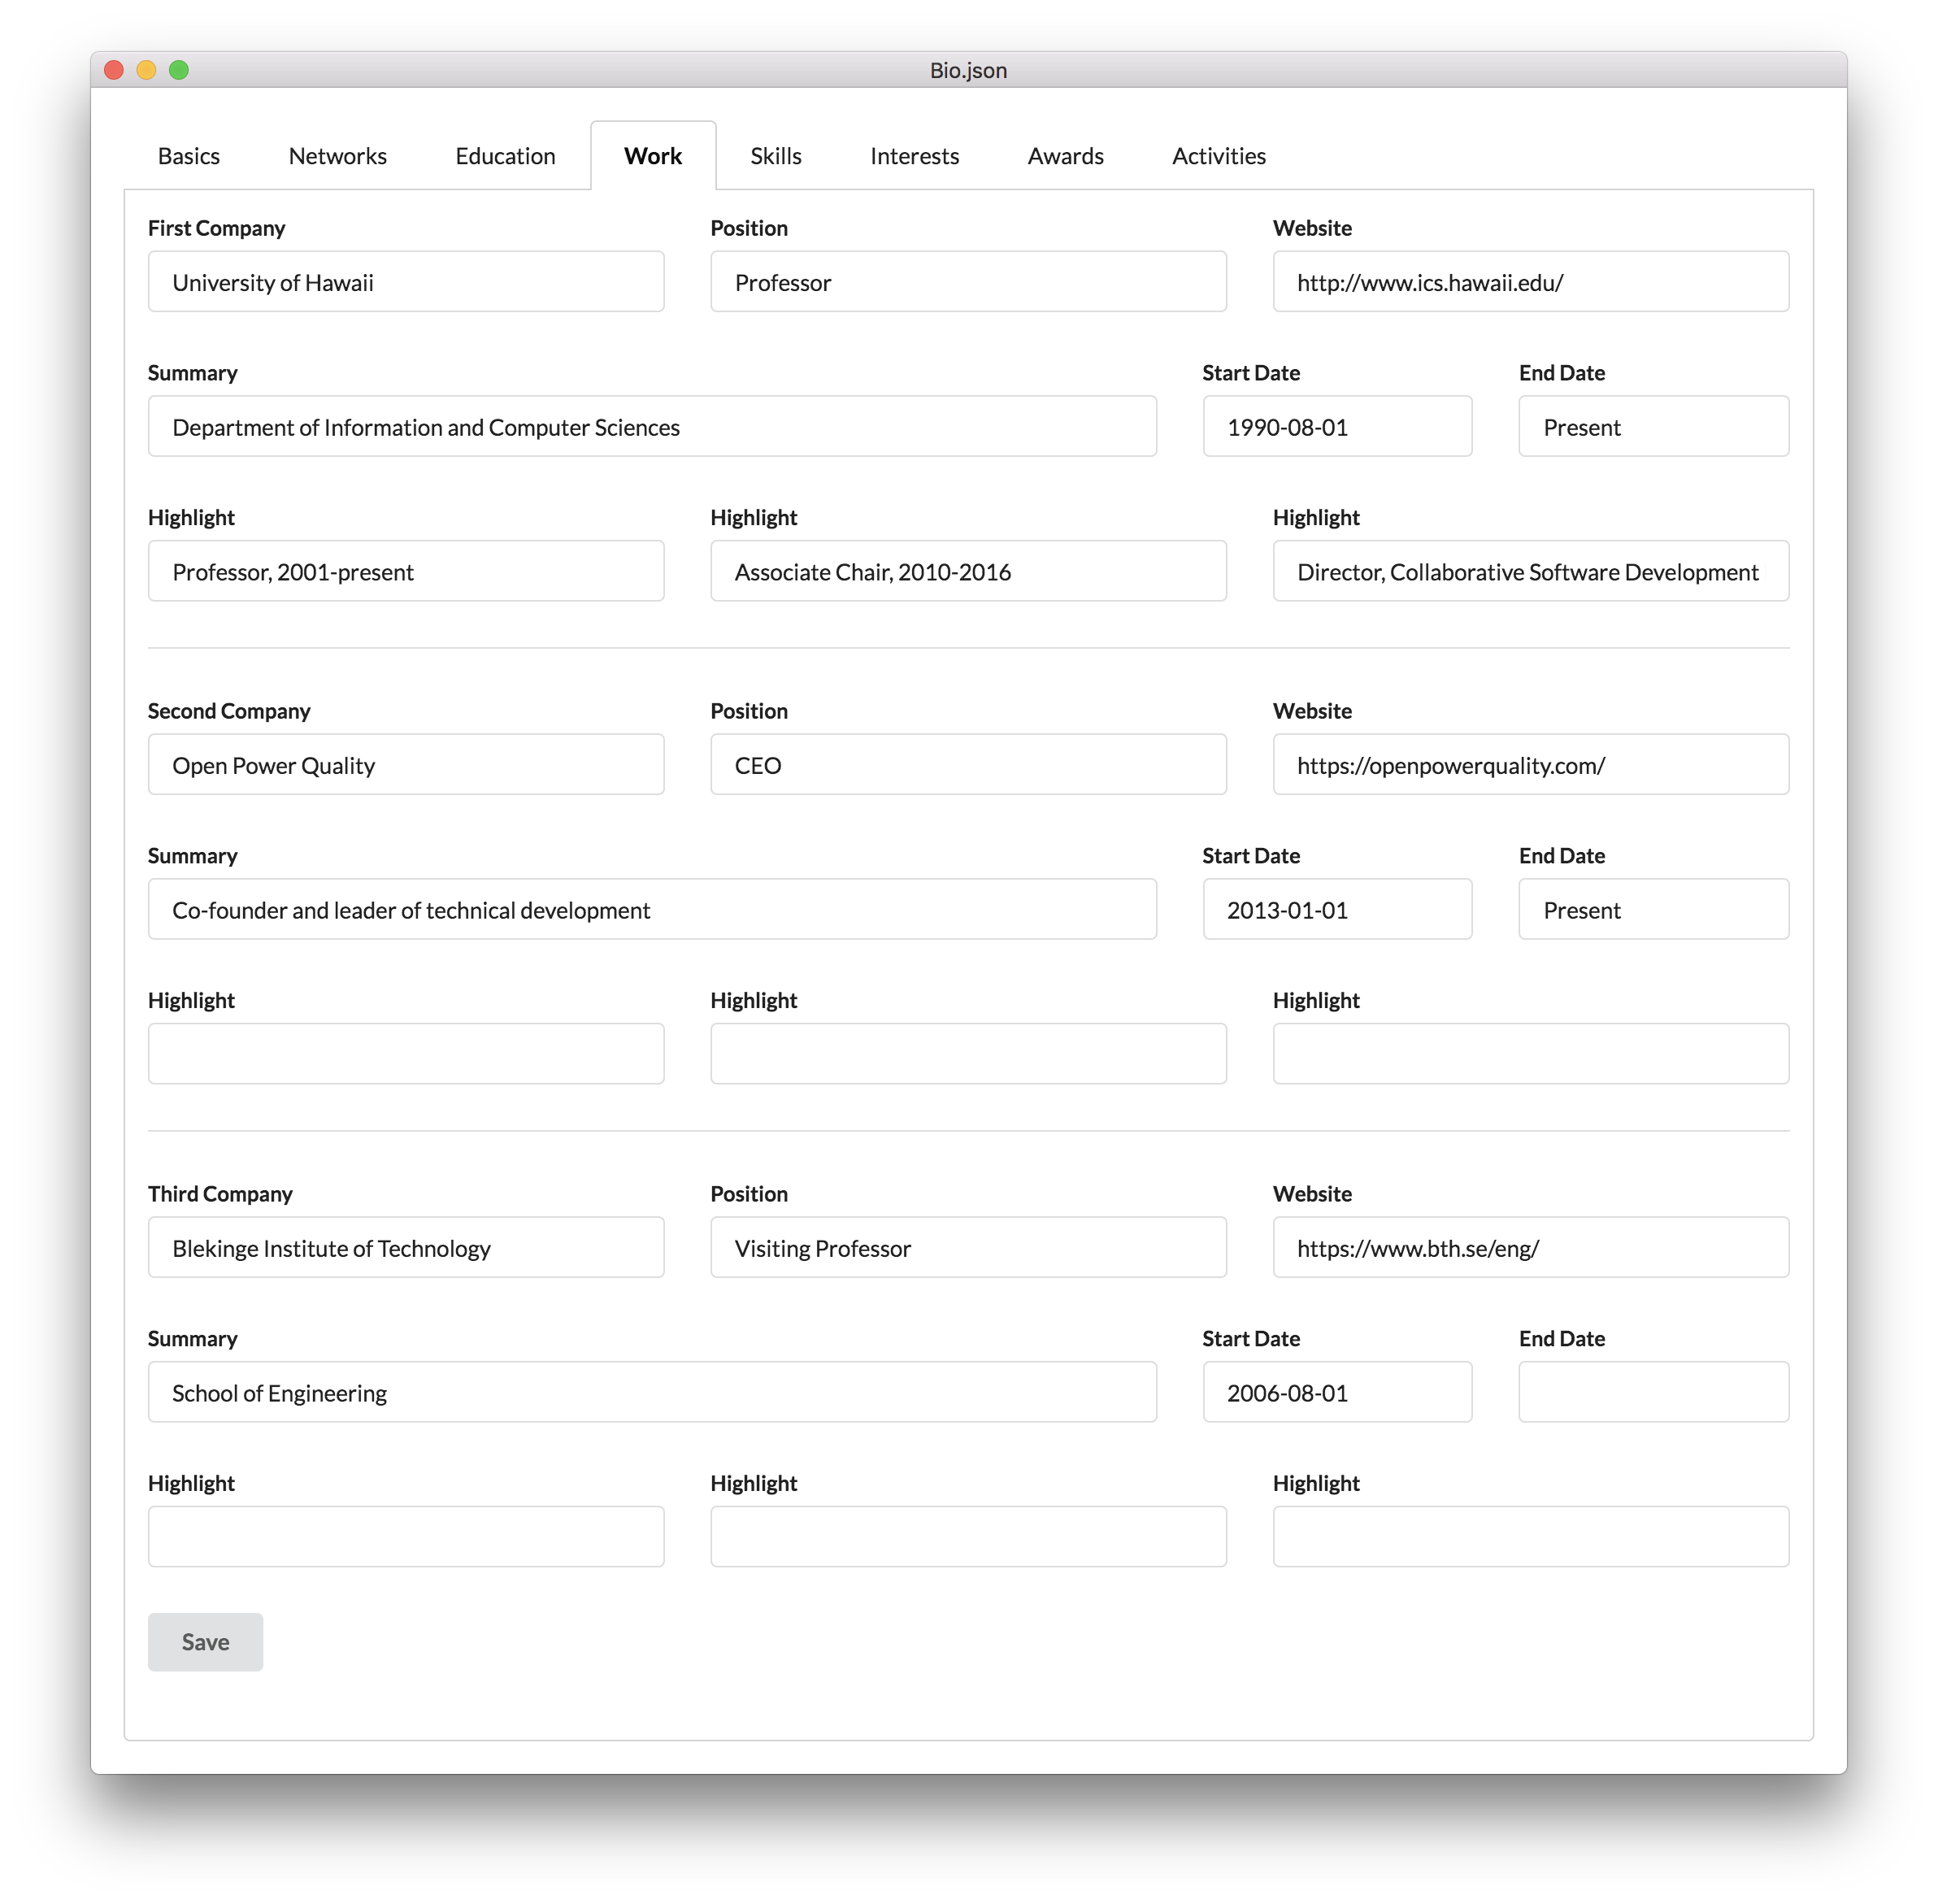
Again, you are limited to three work entries. Don’t forget to press save!
3.2.2 “Regular” Bio Editor
The Simple Bio Editor gets some of its simplicity by limiting your choices. For example, you can’t list more than three networks. In the event that you want to go beyond what is available with the Simple Bio Editor, you can use the “regular” bio.json editor, which you can invoke by selecting “bio.json” from the Bio menu. The following window appears when I select this item:
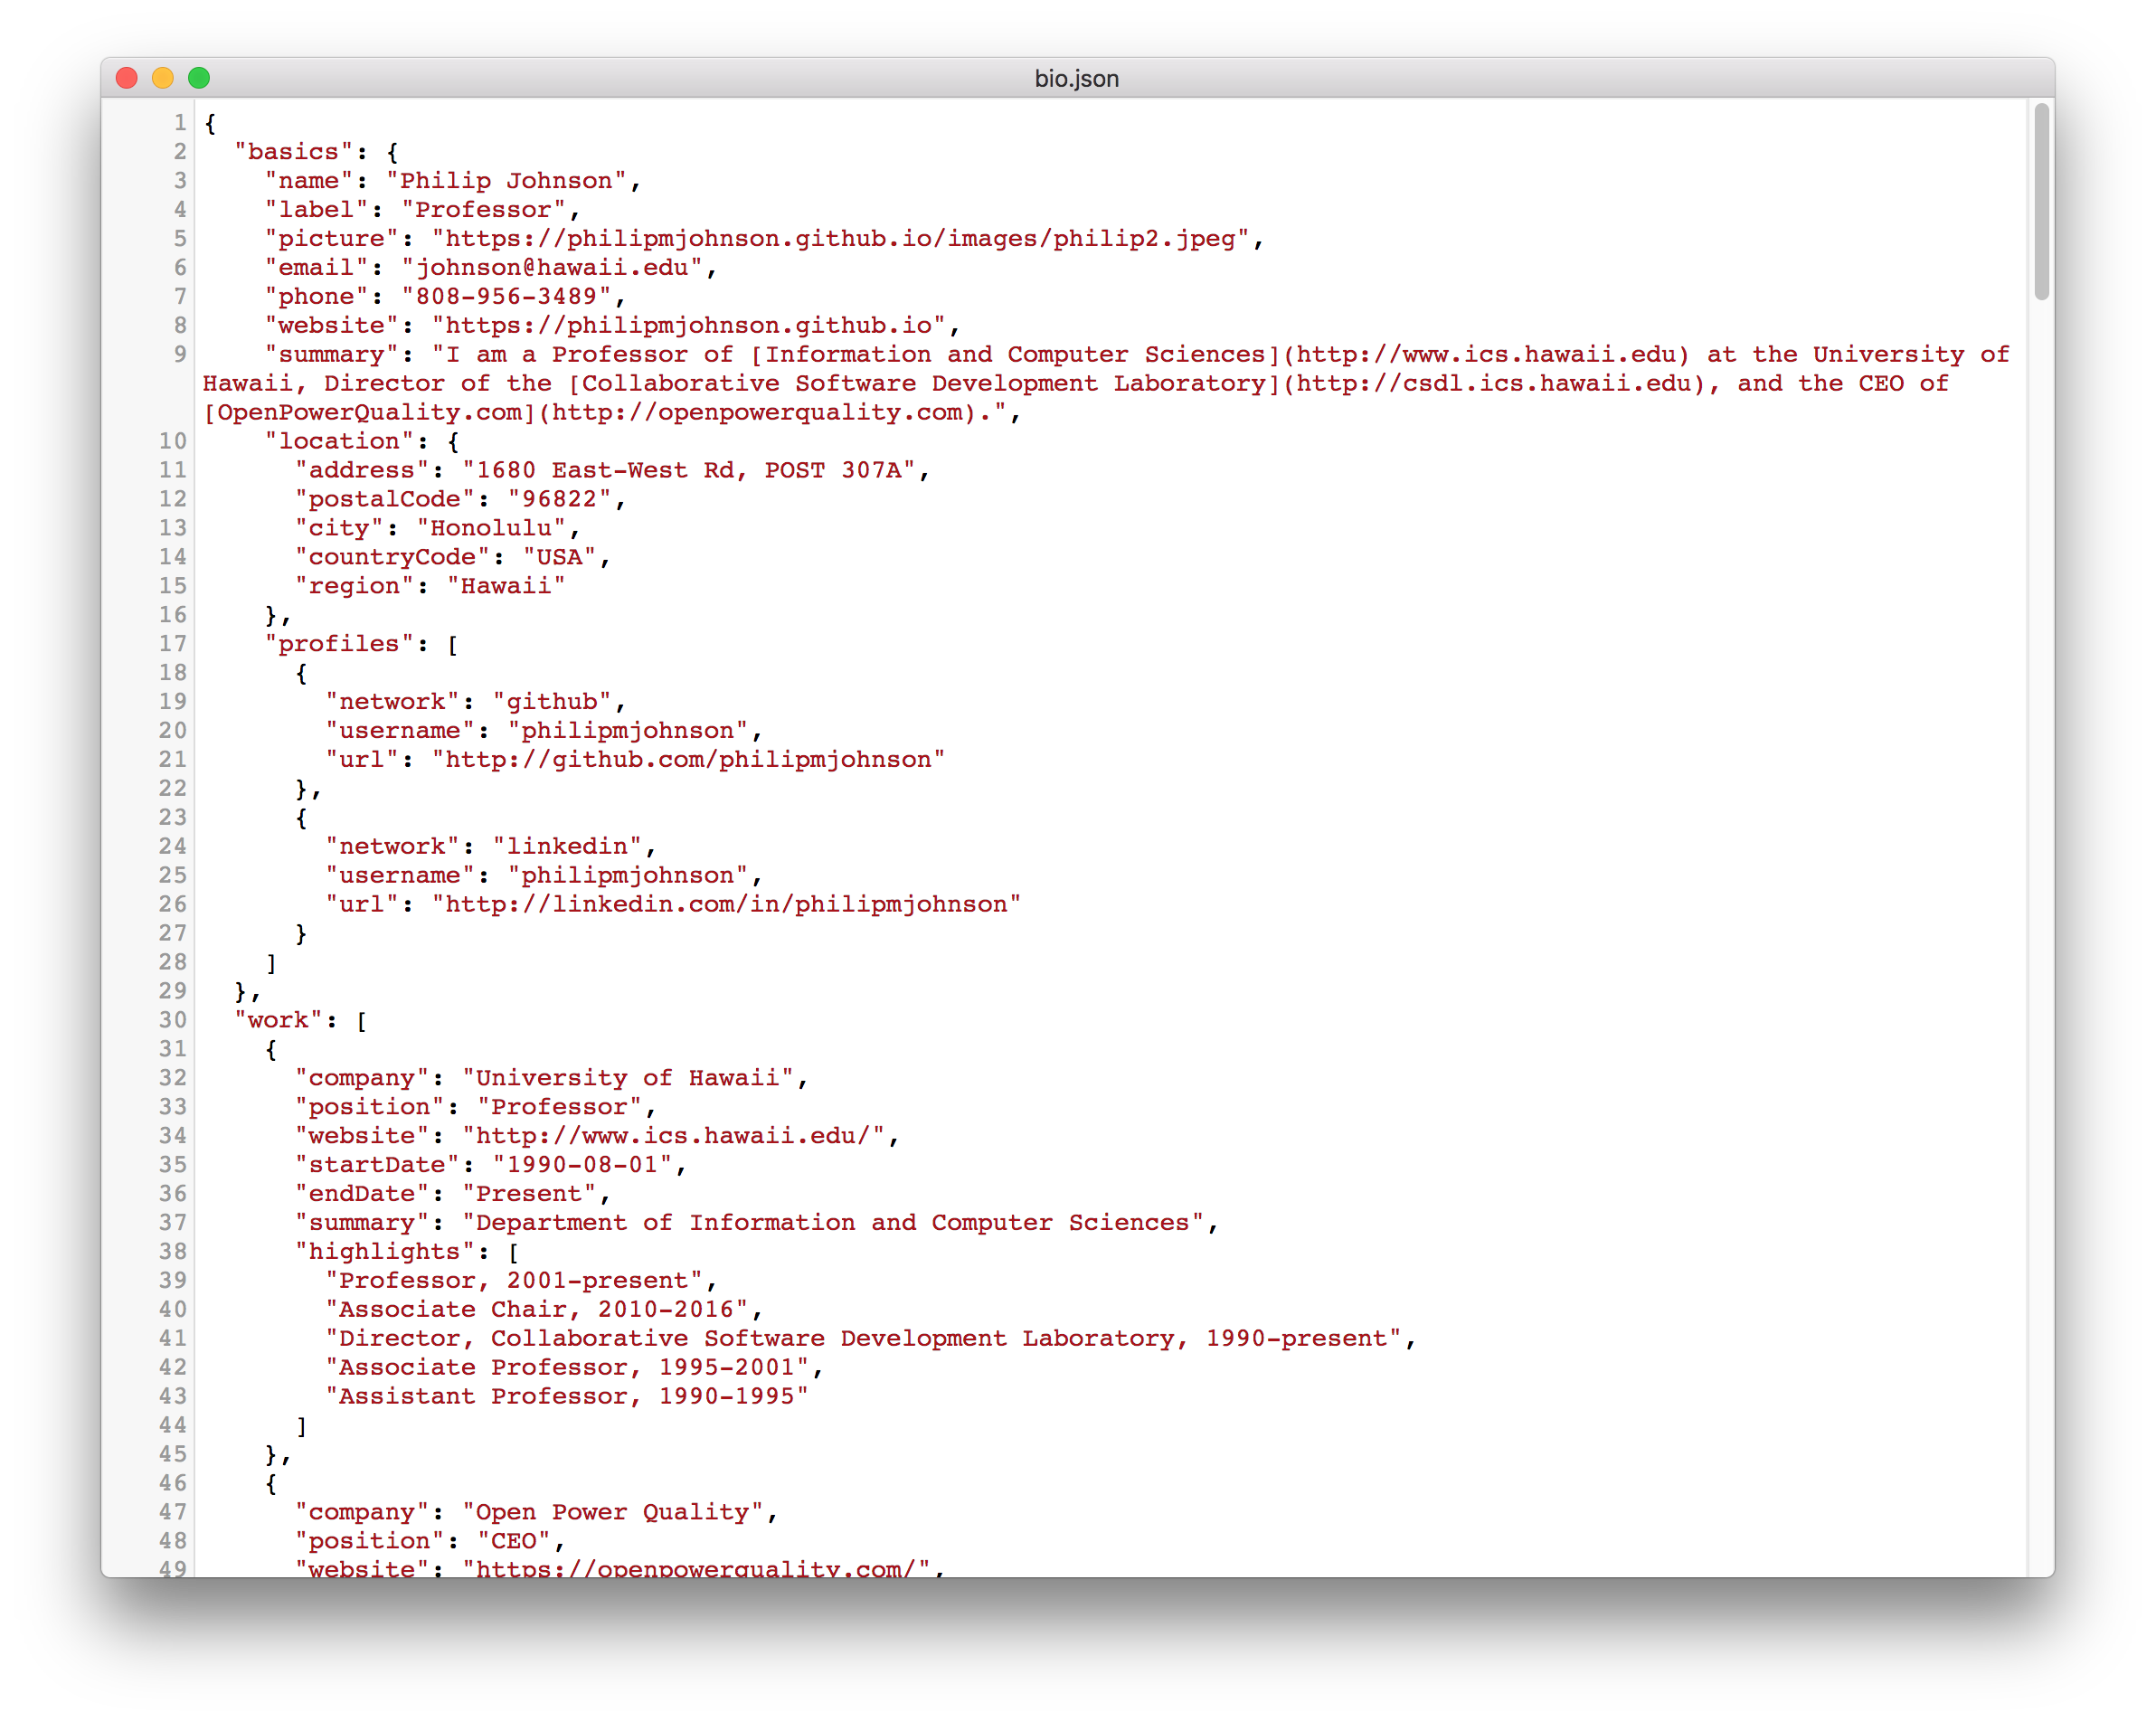
Using this editor, you can now make any changes you like, but you must be careful to adhere to JSON syntax.
Note that once you edit the file, an “*” appears next to the file name in the title bar indicating that the buffer has been changed. To write out the file, use control-s on Windows and Unix, and command-s on Macintosh.
3.2.3 Publishing your changes
After making changes to your bio.json file, you will usually want to publish your changes so that they appear in your online techfolio. To do that, you need to “push” the changes you made to your local copy of your files back to GitHub.
First, let’s see if there are any changes! To determine if you’ve made any changes since cloning the repo from GitHub, use the Config menu and select “Check local directory status”. Here’s what my Splash window looks like after selecting this item:
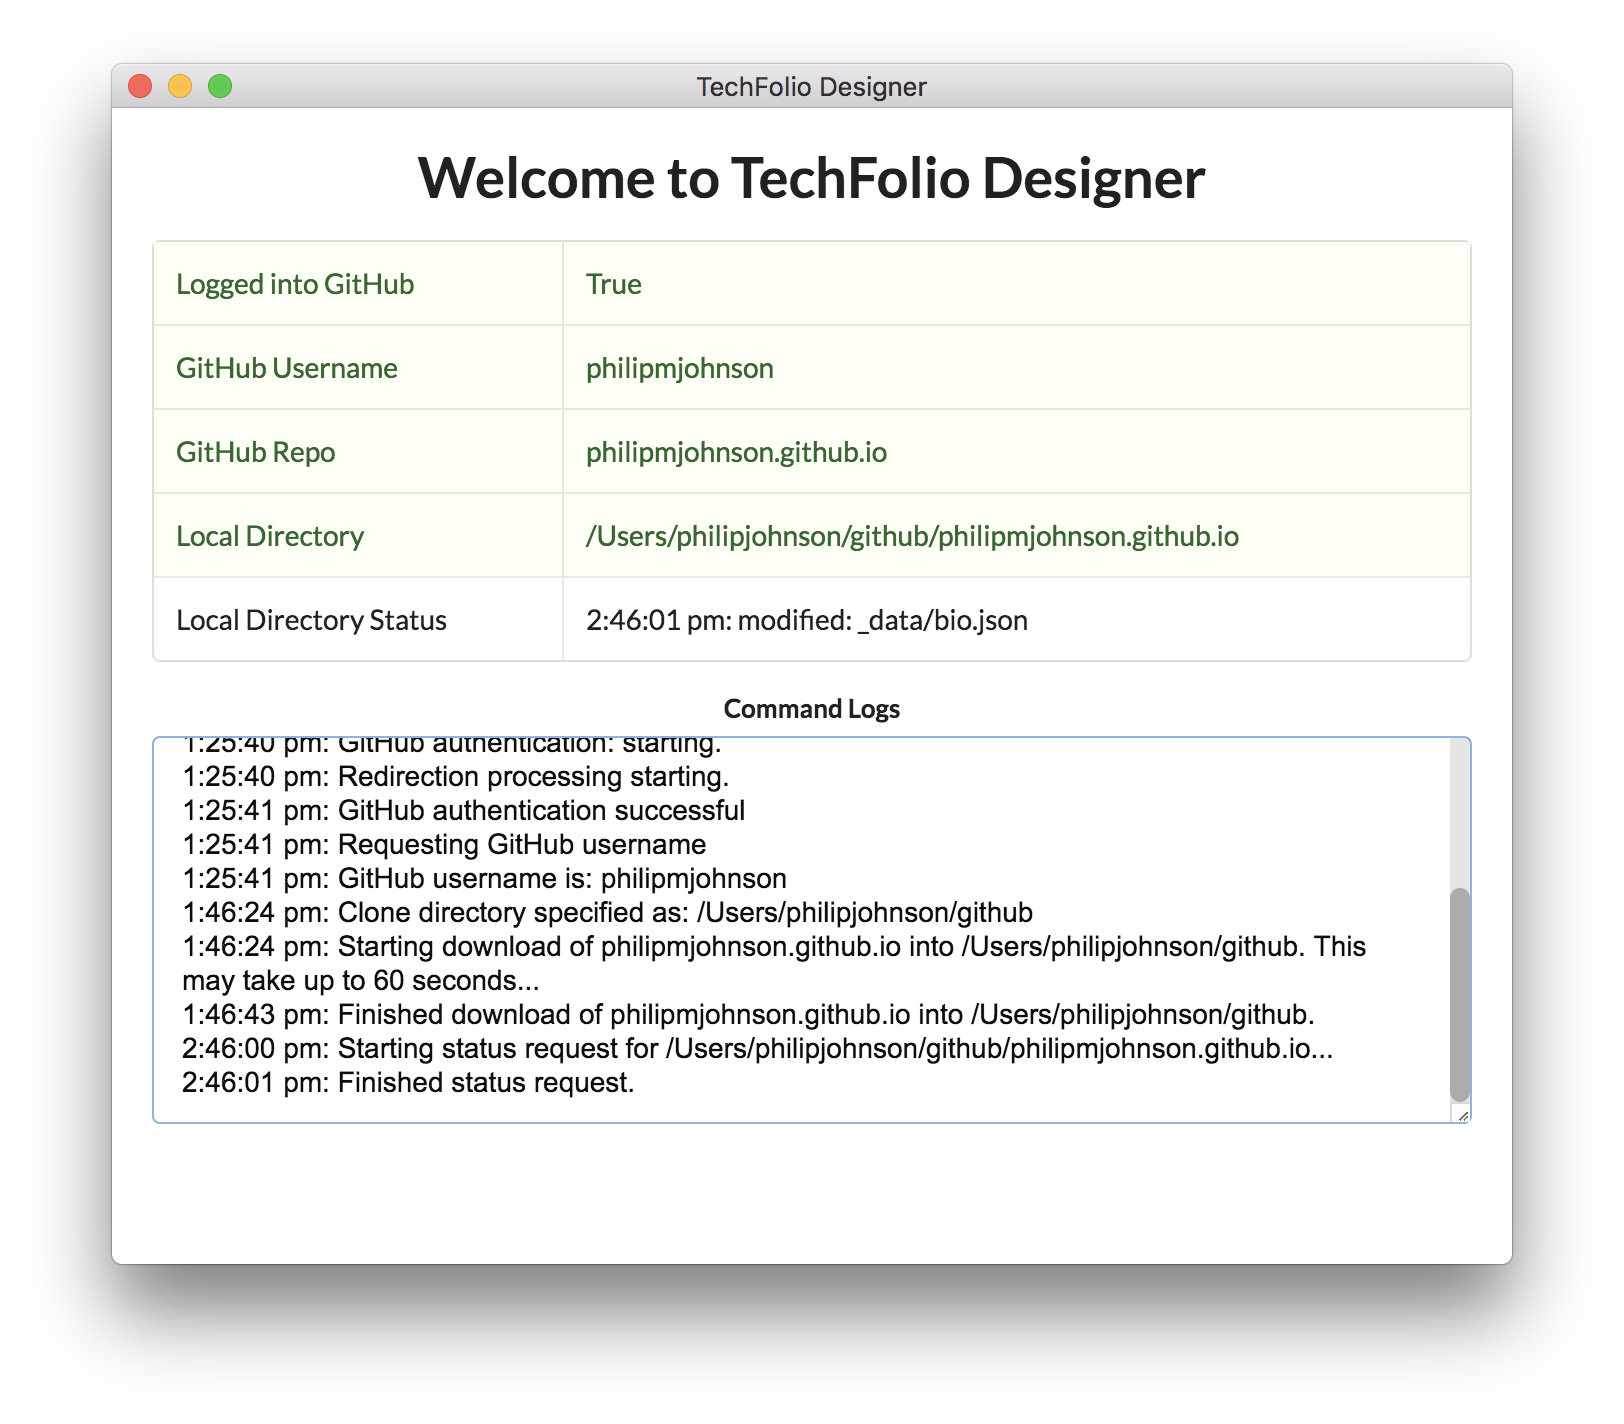
You can see that the “Local Directory Status” row has been updated with a timestamp and the information that the file bio.json has been modified. You can also see that the Command Log pane has been updated to indicate that this command was run.
Running the Check local directory status command is optional, but it’s often useful to make sure you know exactly what has changed before you push changes.
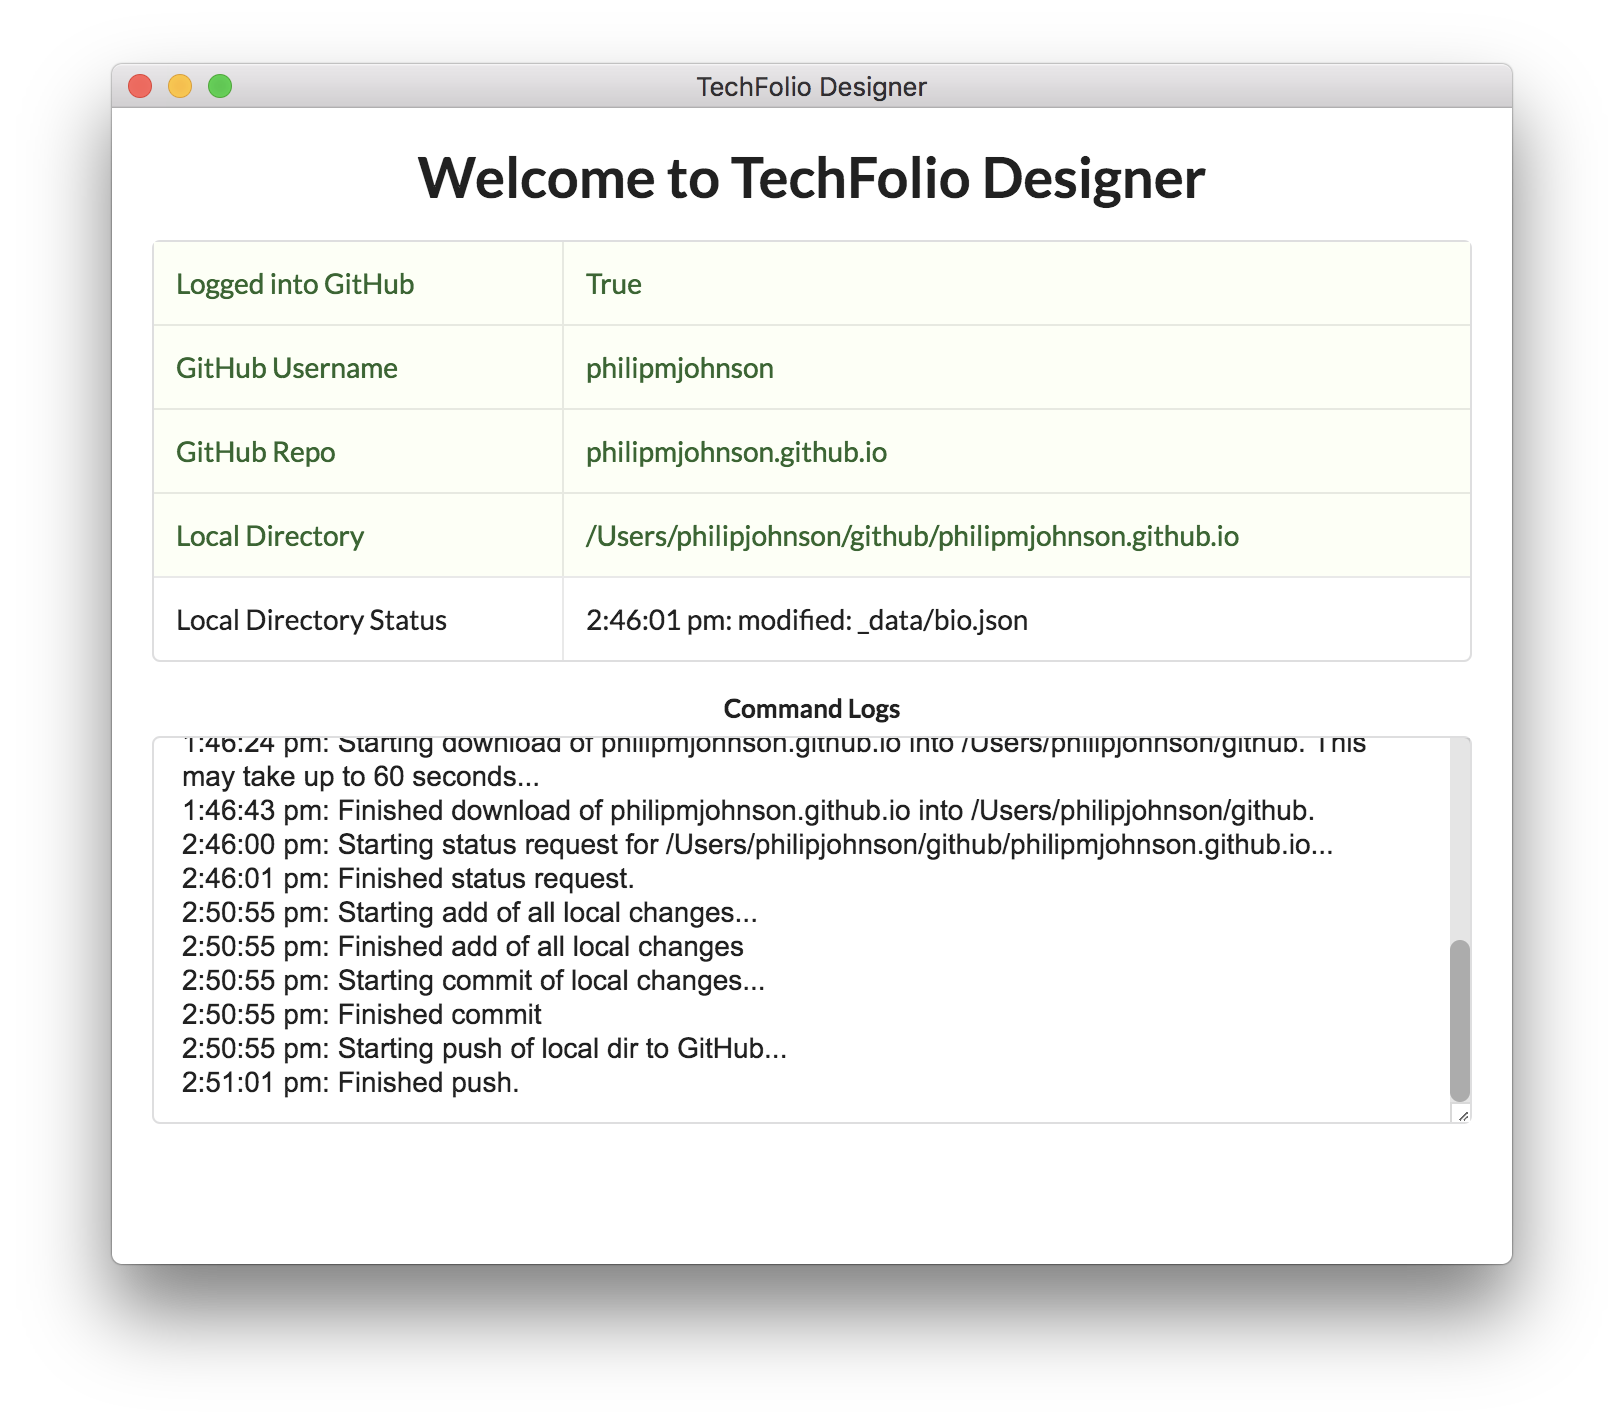
To publish your changes, select the “Push changes to GitHub” item from the Config menu. You’ll see the Command Log update immediately with the message “Starting push of local dir to GitHub”. In my case, the push completed after six seconds, as shown in the Command Log pane which now shows “Finished push”:
3.3 Editing projects
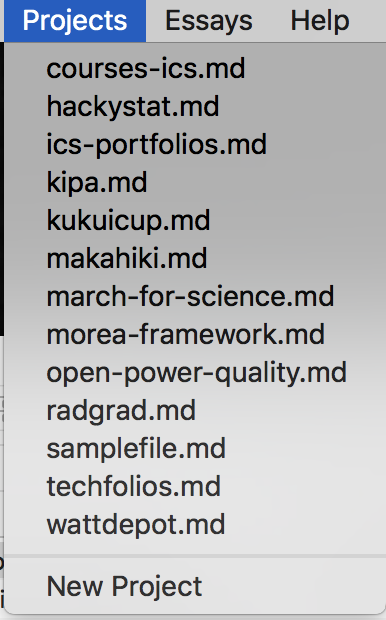
To edit your TechFolio projects, you use the Projects menu:
The projects menu lists the file names for all projects in your TechFolio projects directory. It also provides a menu item for creating a new project from scratch.
3.3.1 Editing existing project
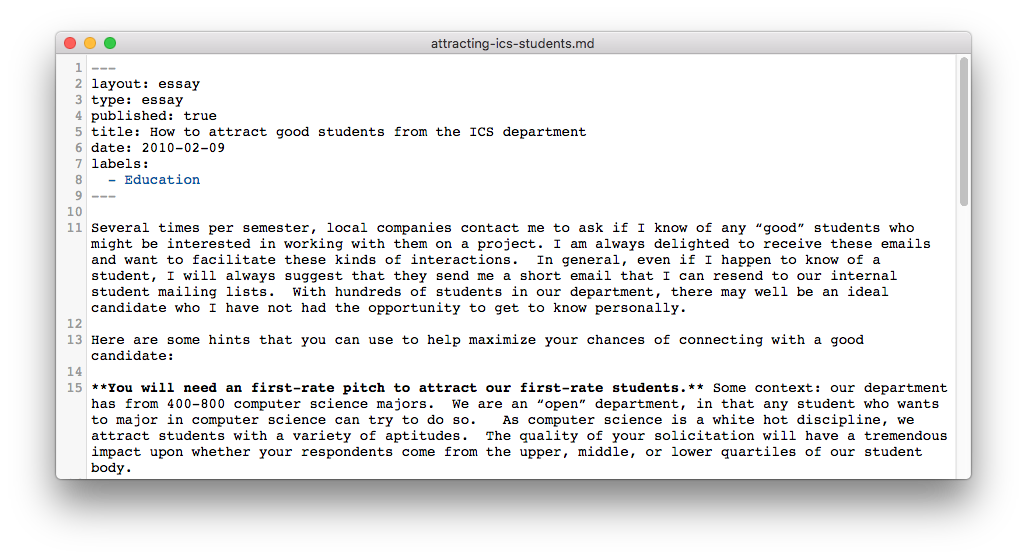
First, let’s select a pre-existing project, such as the project page I created for TechFolios itself. After selecting “techfolio.md”, the following editor window appears:

As soon as I start to edit the file contents, the editor indicates that the buffer is modified by putting a “*” in the title bar area:
When I am finished, I can press “control-s” (Windows, Linux) or “commmand-s” (Macintosh) to save the buffer to its corresponding file.
If I now go to the Splash Window and select “Check Local Directory Status” from the Config menu, the system will report that the techfolio.md file has been modified:

I could publish this change by selecting the “Push changes to GitHub” item from the Config menu. But first, let’s look at creating a new project from scratch.
3.3.2 Creating a new project
To create a new project, select the “New Project” item from the Projects menu. This brings up a dialog box where you can provide the name of the file in which you will describe the project:
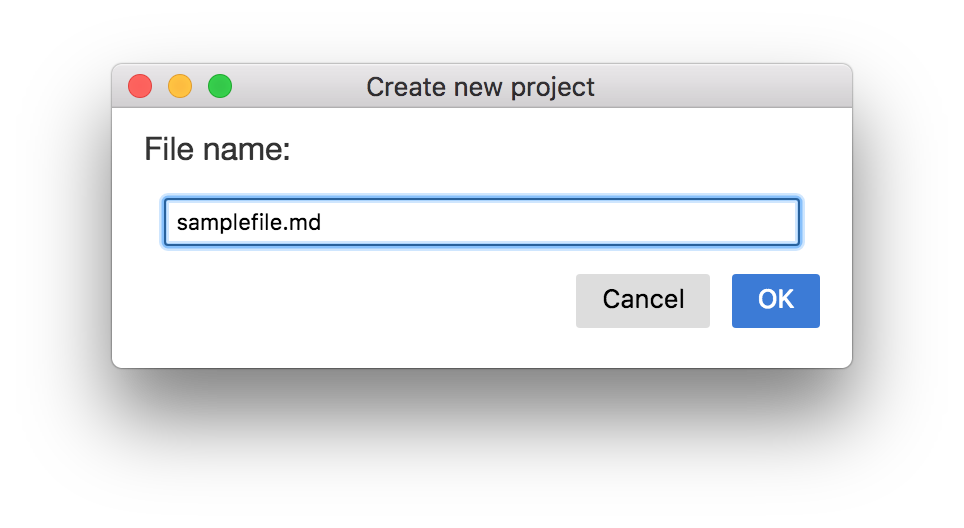
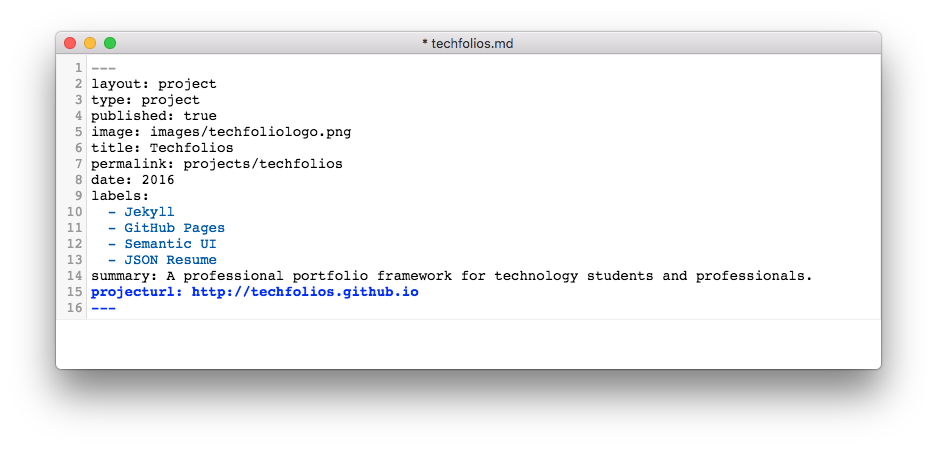
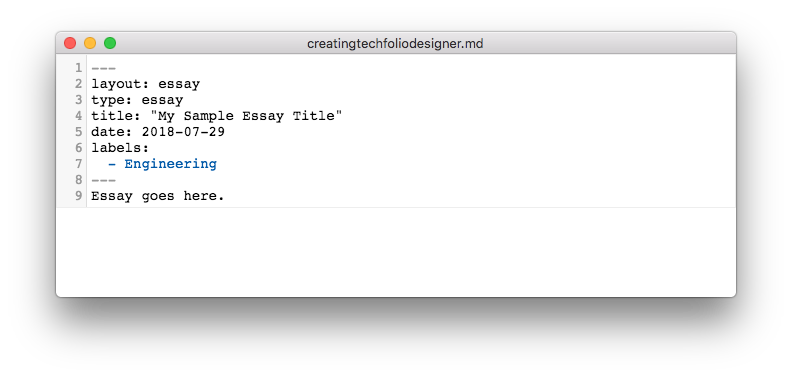
I will create a project to describe the TechFolio Designer, so I edit the file name to be techfoliodesigner.md and press OK. After that, the following window appears containing “template” text for a project:
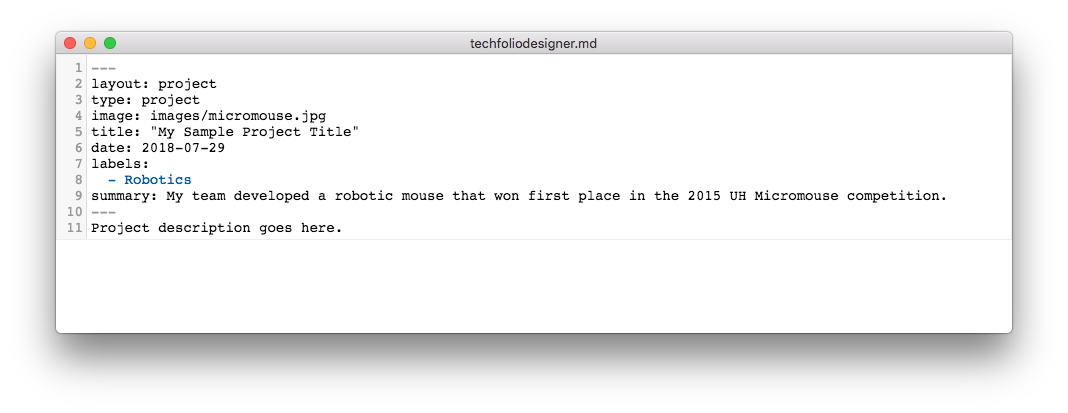
To make this a real project definition, I need to do the following:
-
Create a square image representing the project, and (manually) place it in the images/ directory of your local techfolio directory. (I created one called techfoliodesigner.png, and saved it in github/philipmjohnson.github.io/images). We hope in future to have better support for image manipulation in TFD.
-
Edit the title, labels, summary, and project description field.
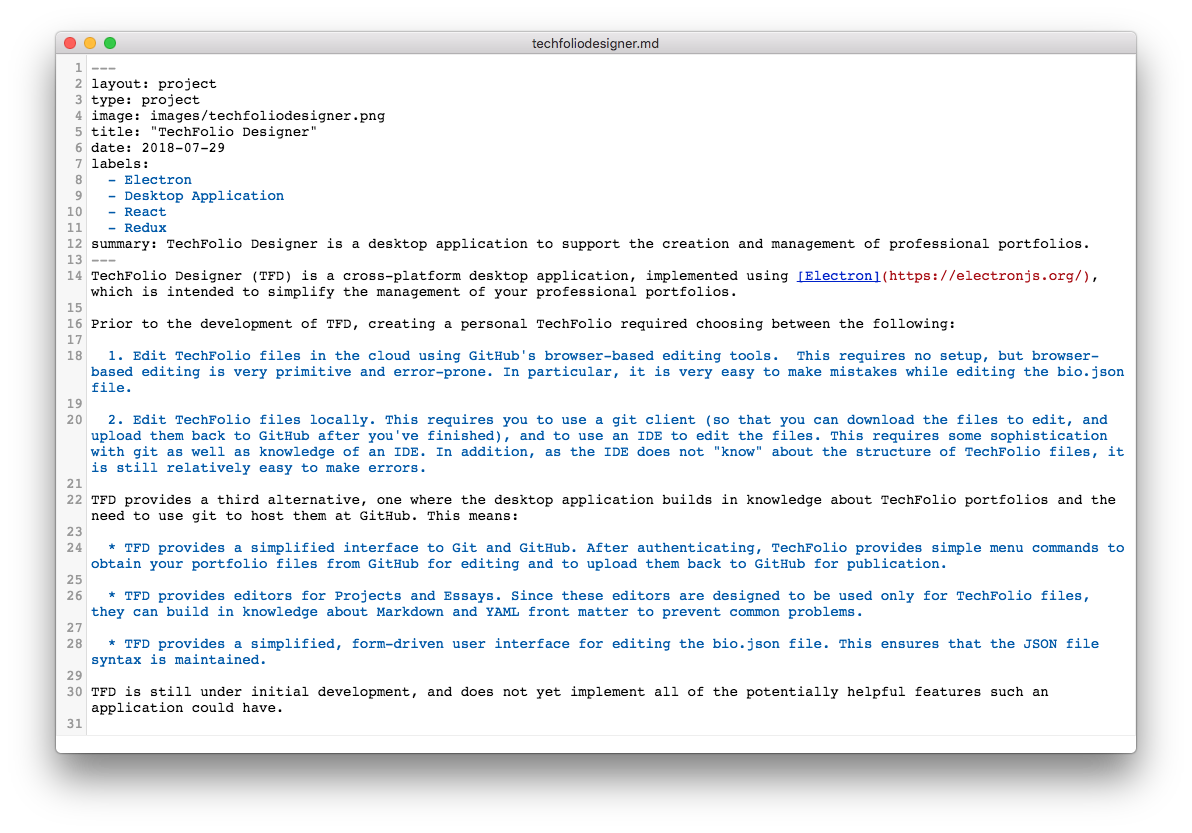
When I’ve finished these changes, my new project definition looks like this:
If I now run the “Check Local Directory Status” from the Config menu, the Splash window now indicates that a new file called techfoliodesigner.md has been created. (It also shows that techfolios.md has been modified, since I haven’t pushed those changes to GitHub.)
3.3.3 Publishing your changes
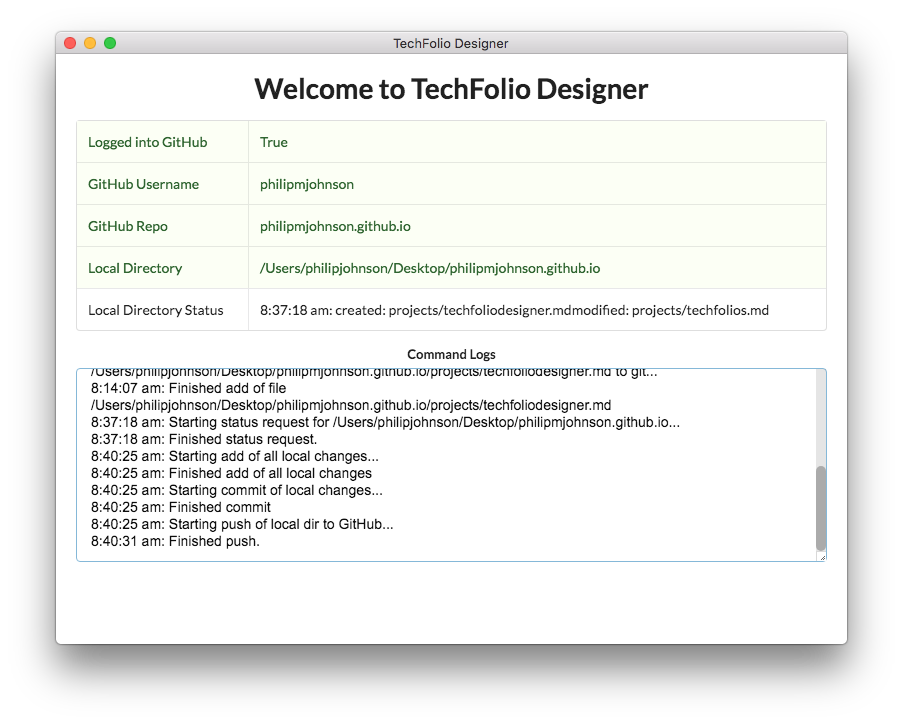
To publish the modification of techfolios.md and the creation of a new project, select “Push changes to GitHub” from the Config menu. Monitoring the Command Log window shows when the push starts, and when it completes. In this case, the push took about six seconds:
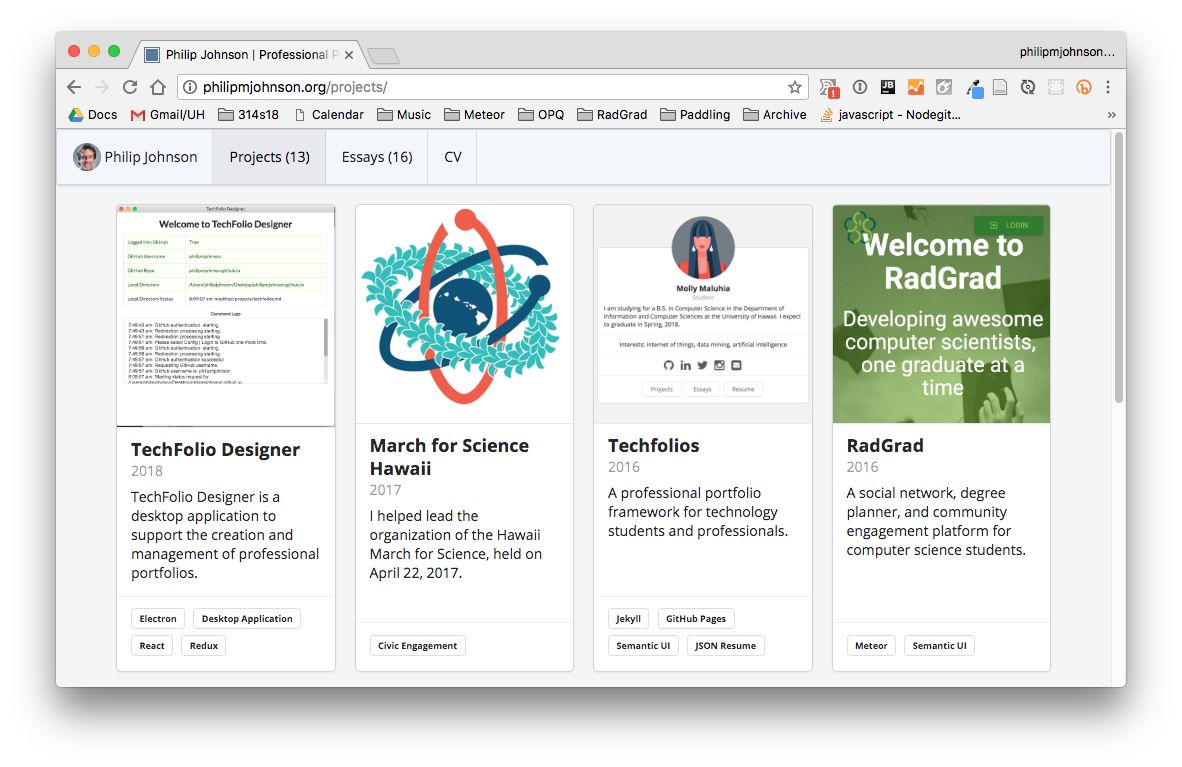
If we now visit the projects page of my professional portfolio, you can see that the new project for TechFolio Designer is now available:
3.4 Editing Essays
Editing and creating essays occurs in exactly the same way as editing and creating projects.
To see all of your existing essays, and to create a new essay, pull down the Essays menu:
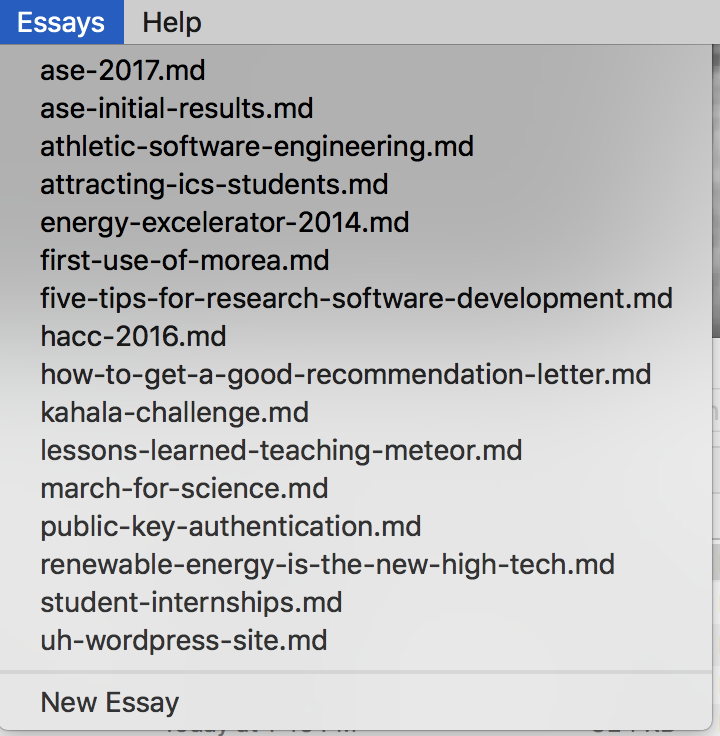
Selecting an existing essay file name from the menu will create an editor for that essay. For example:
After editing the essay, use “control-s” (Windows and Linux) or “command-s” (Macintosh) to save your changes to the file.
To create a new essay, select “New Essay” from the Essays menu. After providing the name of the file in the dialog box, the following template essay will appear for editing:
Write your essay, and save it out using “control-s” (Windows and Linux) or “command-s” (Macintosh).
When you are ready to publish your changes, select “Push changes to GitHub” from the Config menu.
4. For more information
If you have questions or concerns about TechFolio Designer, please contact Philip Johnson (johnson@hawaii.edu).